Water on the floor is the part everyone sees. The real problem starts when moisture moves into drywall, wood framing, insulation, subfloors, and concrete. This guide to structural drying explains what has to happen after water intrusion if you want to stop swelling, warping, odours, mould growth, and hidden structural deterioration.
If a pipe bursts at 2 a.m. or a basement floods after heavy rain, the first priority is always safety and water removal. But extraction alone does not dry a building. Porous and semi-porous materials continue to hold moisture long after the visible water is gone, and that is where many property owners lose time and money. Drying is a controlled technical process, not a matter of setting up a few fans and hoping for the best.
What structural drying actually means
Structural drying is the process of returning affected building materials to an acceptable dry standard after water damage. That includes the obvious surfaces, but also the hidden areas where moisture travels – wall cavities, under flooring, behind baseboards, inside insulation, and around framing connections.
The goal is not to make a room feel dry. The goal is to reduce moisture content within the structure so materials can remain stable, safe, and suitable for repair or reconstruction. If that does not happen, trapped moisture can keep migrating, damage finishes, weaken materials over time, and create conditions for microbial growth.
This is why professional drying plans rely on measurement, containment when needed, and daily adjustment. Different materials release moisture at different rates. Hardwood behaves differently than concrete. Drywall dries differently than structural lumber. A proper drying strategy accounts for all of that.
Why fast action matters
Water damage changes quickly. Within hours, moisture can wick upward into drywall and spread laterally through flooring systems. In a day or two, painted surfaces may blister, trim can swell, and adhesives may begin to fail. If the source involves contaminated water, the health and sanitation risk rises immediately.
Mould risk is another reason speed matters. You do not need standing water for mould to become a concern. Persistent dampness inside a wall cavity or beneath laminate flooring can be enough. The longer moisture remains, the more likely the job shifts from drying alone to drying plus demolition, sanitization, and mould remediation.
For commercial properties, delay also affects operations. Wet materials can interrupt tenant occupancy, damage inventory, affect air quality, and extend downtime. Acting early often reduces both the scope of restoration and the cost of repairs.
The stages of a professional drying process
Inspection and moisture mapping
Before equipment is placed, the affected area needs to be assessed properly. Technicians identify the water source, category of water, affected materials, and how far moisture has spread. Moisture meters, thermal imaging, and hygrometers help build a drying map. This step matters because the visible damage is often only part of the loss.
An unfinished basement may show pooled water near one wall, but moisture could already be under flooring in the adjacent room or inside the bottom section of surrounding walls. Drying without moisture mapping often means parts of the structure are missed.
Water extraction
Removing bulk water is the fastest way to improve drying conditions. The more water that is extracted early, the less time is needed for evaporation later. Depending on the loss, this may involve pumps, truck-mounted extraction, portable extraction units, or specialty tools for carpets and hard surfaces.
Extraction is critical, but it is not the end of the job. Materials can still test wet after every visible puddle is gone.
Controlled demolition when needed
Not every wet material can or should be saved. It depends on the water category, the material type, how long it has been wet, and whether drying can be achieved without trapping contamination or moisture.
For example, baseboards may need to be removed to access wet drywall edges. Saturated insulation inside an exterior wall often has to come out because it holds water and restricts airflow. In sewage backups, porous materials may require disposal for safety reasons.
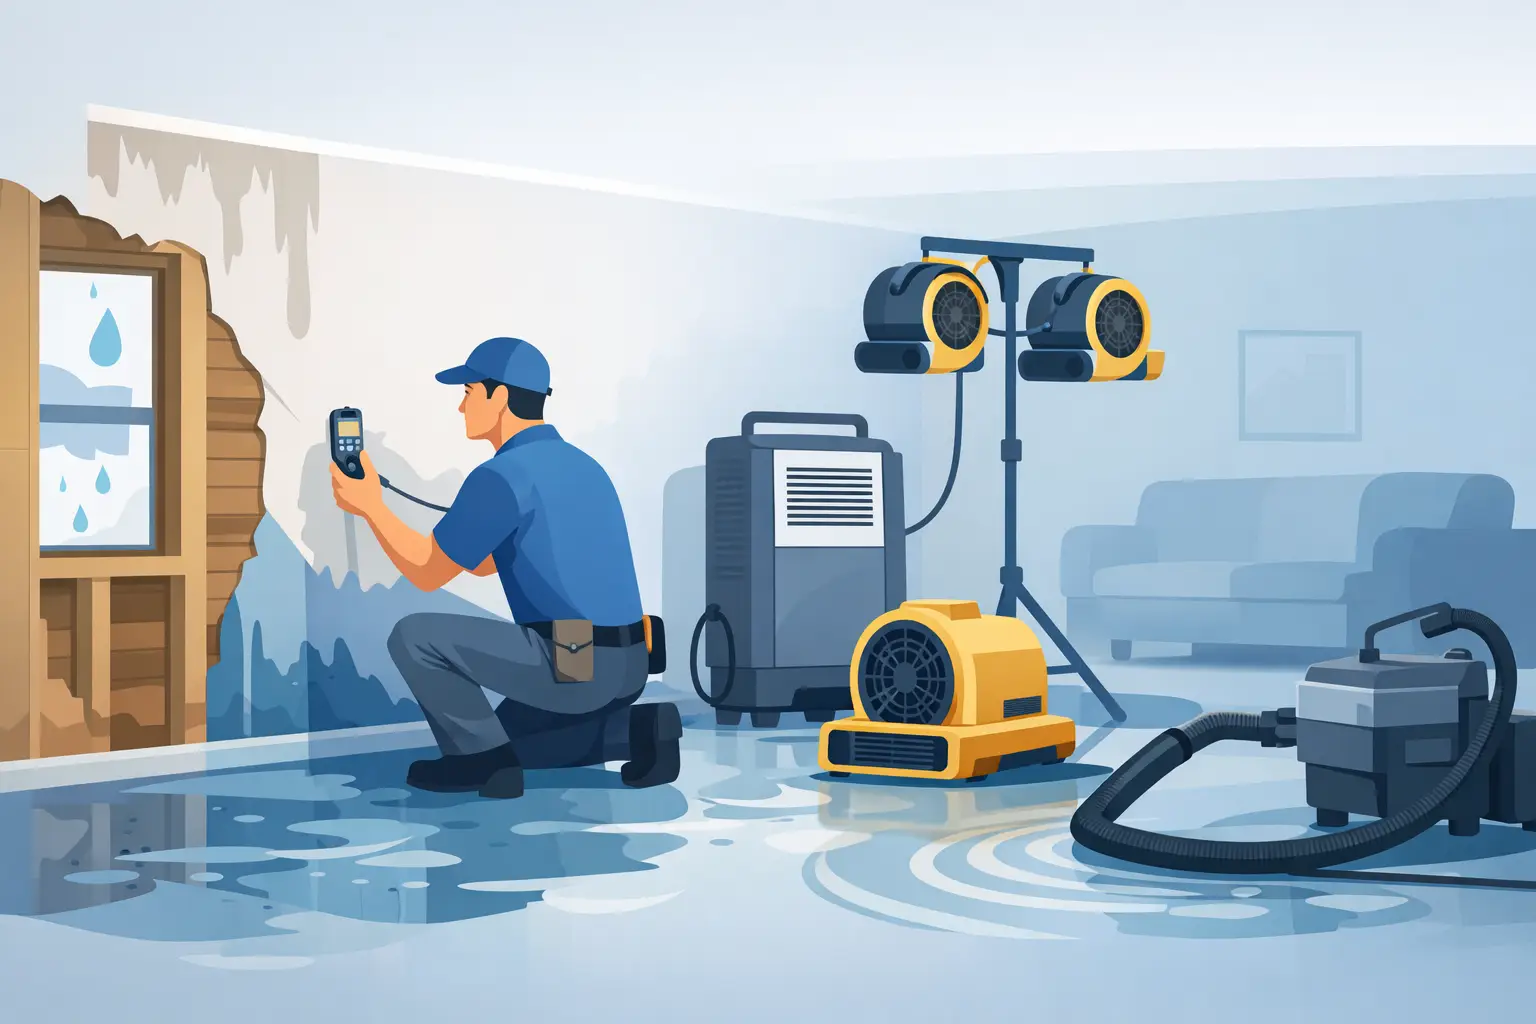
Air movement, dehumidification, and temperature control
This is the core of structural drying. Air movers help disturb the boundary layer of saturated air sitting against wet materials. Dehumidifiers remove moisture from the air so evaporation can continue. In some cases, heat is added or adjusted to improve drying efficiency, but it has to be balanced carefully. More heat is not always better if humidity is left unmanaged.
Specialty systems may be used for hardwood floors, wall cavities, crawl spaces, or dense assemblies. The setup depends on what is wet and how the building is constructed.
Monitoring and equipment adjustment
Drying is not a set-it-and-forget-it process. Moisture levels should be checked regularly, and equipment should be adjusted as conditions change. Some materials dry quickly on the surface while remaining wet internally. Others may require more focused drying once surrounding areas begin to stabilize.
A reliable drying plan tracks moisture content against unaffected areas or known dry standards. The process ends when materials reach acceptable levels – not when they look better.
A guide to structural drying equipment
The equipment used on a drying job is chosen based on psychrometrics, material type, room configuration, and extent of damage. That sounds technical because it is.
Air movers are used to increase airflow across wet surfaces. Refrigerant dehumidifiers work well in many standard loss conditions, while desiccant dehumidifiers are useful for larger or lower-temperature environments. HEPA-filtered air scrubbers may be added when air quality is a concern, especially after contaminated water losses or when mould risk is present.
Moisture meters confirm whether wood, drywall, and other materials are actually drying. Thermal imaging cameras help identify temperature differences that can point to hidden moisture, though they do not replace direct moisture readings. Injectidry or cavity drying systems can target moisture behind walls or under cabinets with less demolition in some situations.
The trade-off is simple. More equipment is not automatically better, and too little equipment slows the job. The right setup is the one that dries the structure efficiently without creating unnecessary disruption.
Common mistakes property owners make
One of the biggest mistakes is waiting to see if things dry on their own. Another is assuming that if the carpet or tile surface feels dry, the subfloor and wall base are also dry. That assumption leads to odours, staining, buckling, and mould later.
A second mistake is relying on household fans and opening windows without understanding indoor humidity conditions. During a humid Toronto summer, bringing in outside air can actually make drying harder. The same applies to turning up the heat without dehumidification. Warm, damp air still leaves materials wet.
A third mistake is replacing drywall, flooring, or trim before moisture targets are met. Repairs done over wet assemblies often fail. Paint peels, flooring lifts, and hidden growth continues behind finished surfaces.
How long structural drying takes
There is no single timeline that fits every loss. A minor clean water incident affecting a small area may dry within a few days. A basement flood involving multiple materials, concealed spaces, or contaminated water can take much longer, especially if demolition and sanitization are required.
Material type matters. Solid wood, engineered flooring, plaster, insulation, and concrete all dry differently. Weather also matters. So does how quickly the response began. Fast extraction and same-day drying setup usually improve the outcome.
What matters most is progress backed by measurements. Estimated timelines are helpful, but moisture readings decide when drying is complete.
When to call certified professionals
Professional help is not only for major floods. You should bring in certified restoration technicians when water has affected structural materials, when the source is sewage or potentially contaminated, when moisture has entered walls or flooring systems, or when the loss affects multiple rooms or units.
This is especially true in condos, commercial spaces, and occupied rental properties where hidden moisture can create liability issues. A documented drying process helps support insurance claims, protects indoor environments, and reduces the chance of recurring damage.
For urgent losses across Toronto and the GTA, speed and technical control make the difference. CPR24 Restoration handles emergency drying with IICRC-certified technicians, commercial-grade equipment, and full-service restoration from extraction through repairs when needed.
What a successful drying outcome looks like
A properly dried structure should do more than pass a visual check. Materials should test within acceptable moisture ranges, odours should be addressed, affected assemblies should be stable, and the property should be ready for safe repair or reinstallation.
That outcome protects more than the building. It protects budgets, schedules, tenant confidence, resale value, and peace of mind. Water damage gets expensive when hidden moisture is left behind.
If your property has been hit by a leak, flood, or backup, treat drying as a technical recovery step, not a cleanup extra. The right response in the first 24 to 48 hours can prevent a much larger restoration problem from taking hold.