
A wet wall can look harmless for the first few hours. Then paint starts to bubble, drywall softens, trim swells, and that damp smell settles in. If you are searching for how to dry water damaged walls, speed matters – but so does doing it the right way. Drying the surface is not enough. Moisture often sits inside drywall cavities, insulation, baseboards, and framing long after the wall feels dry to the touch.
That hidden moisture is what turns a manageable water loss into mould growth, drywall failure, and more expensive repairs. The right response depends on the source of the water, how long the wall has been wet, and what materials are behind it.
First, stop the water and assess the risk
Before you start drying, make sure the source of the water is under control. A leaking supply line, roof leak, overflowing appliance, burst pipe, or seepage issue has to be stopped first. If water is still entering the wall, any drying effort will fail.
Next, consider what kind of water touched the wall. Clean water from a supply line is very different from sewer backup, toilet overflow with contamination, or floodwater that entered from outside. If the water is contaminated, the wall may not be a drying-only situation. It may require removal, sanitization, and controlled remediation to protect indoor air quality and occupant safety.
Power is another concern. If water travelled near outlets, switches, or electrical runs inside the wall, shut off power to the affected area before opening anything up. In commercial units and multi-residential buildings, this step should be coordinated carefully to avoid wider risk.
How to dry water damaged walls: the right order
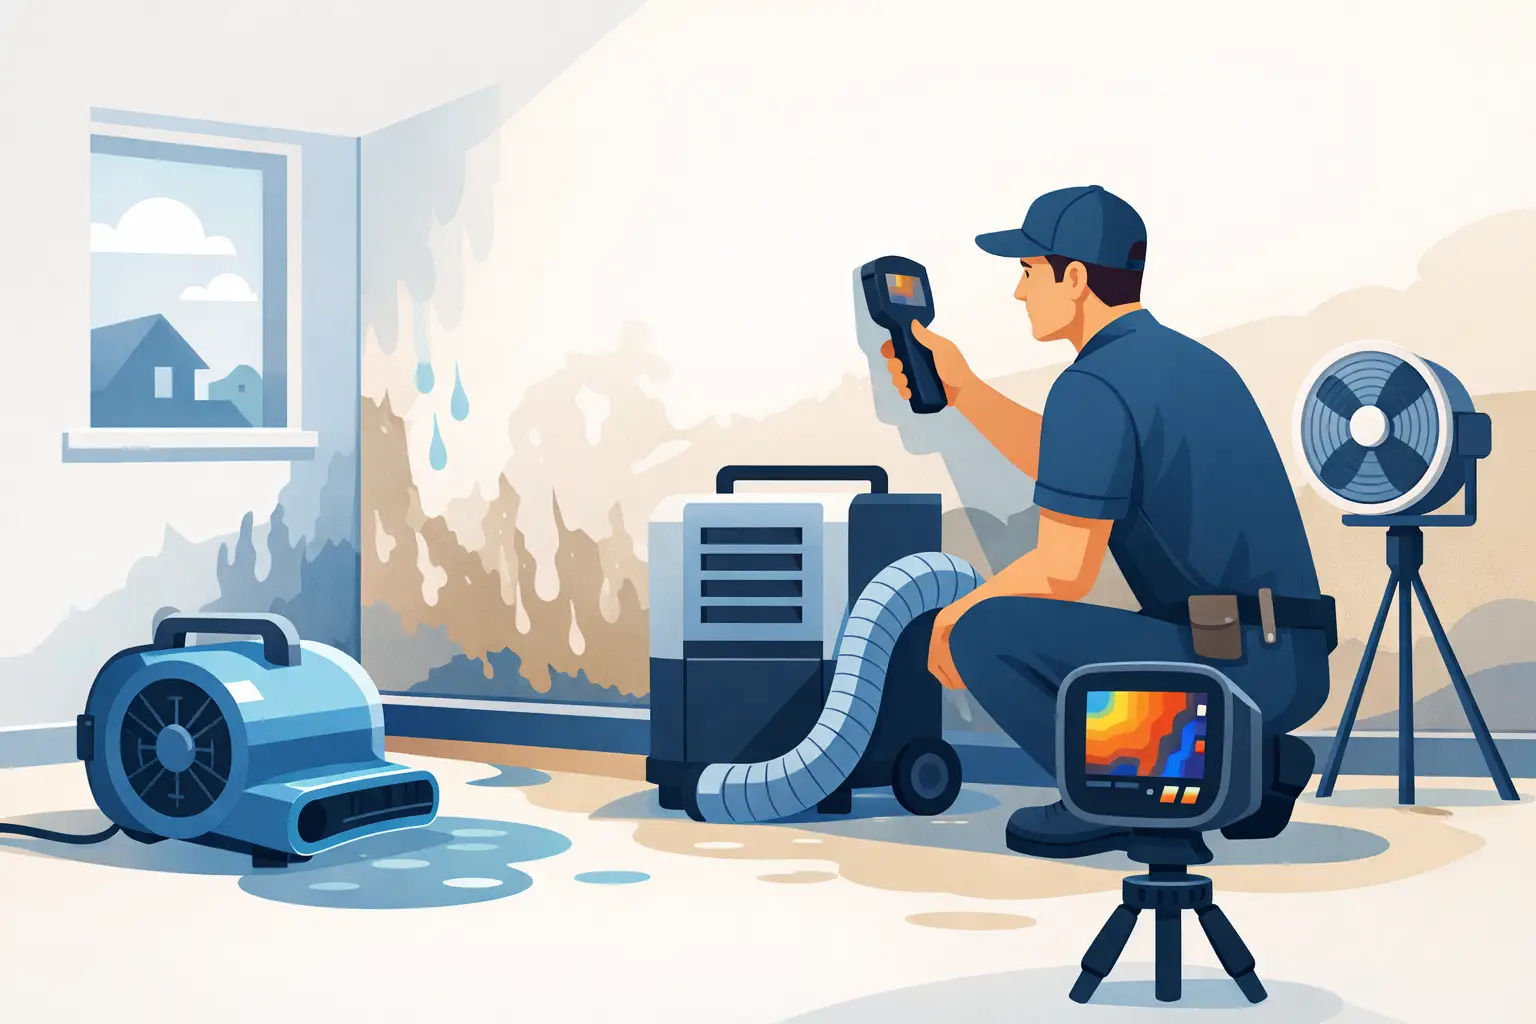
The biggest mistake property owners make is trying to save time by aiming fans at a painted wall and hoping for the best. Effective drying follows a sequence. You remove standing water, open affected materials as needed, control humidity, move air properly, and verify that the wall is actually dry.
Start by removing any visible water from floors and baseboards. If the wall absorbed water from a flooded floor, the lower section is usually the most saturated. Baseboards often trap moisture, so they may need to be removed to allow airflow behind the wall surface.
Drywall can absorb water quickly. In some cases, small access openings near the base of the wall help release trapped moisture and allow air to circulate inside the cavity. If insulation is wet, drying becomes more complicated. Fiberglass can sometimes be dried if the water source was clean and response was immediate, but saturated insulation often holds moisture too long. Wet cellulose insulation is even less forgiving and typically needs removal.
Once the wall cavity is accessible, professional drying equipment makes a major difference. Air movers push airflow across wet surfaces, while dehumidifiers pull moisture from the air so evaporation can continue. Without dehumidification, moisture simply relocates inside the room and slows the entire process.
Why walls stay wet longer than expected
A wall can seem fine on the outside while remaining wet internally for days. Paint, wallpaper, tile, and certain wall finishes act as vapour barriers. They slow evaporation and trap moisture inside the assembly. That is why a wall that feels dry at noon can still show elevated moisture readings later.
Older homes across Toronto and the GTA can add another layer of complexity. Plaster walls dry differently than standard drywall, and multiple repainting layers can reduce permeability. In condos, shared wall assemblies may also limit airflow and affect how moisture spreads. In commercial spaces, steel stud framing and insulated partitions can create hidden pockets of moisture that are not visible during a basic inspection.
This is where moisture mapping matters. Drying should be based on readings, not guesswork. Moisture meters and thermal imaging help identify how far the water travelled and whether the framing, insulation, or adjacent rooms are also affected.
When you can dry the wall and when removal is smarter
Not every wet wall has to be torn out. If the water was clean, the damage was discovered quickly, and the drywall has not lost its structural integrity, drying in place may be possible. That is more likely when the affected area is small and there is no insulation saturation, swelling, staining, or microbial growth.
But there are clear situations where removal is the safer option. If the wall has been wet for more than 24 to 48 hours, mould risk rises quickly. If the drywall is soft, crumbling, warped, or visibly stained, it may not recover properly. If contaminated water entered the wall, porous materials usually cannot be safely restored. In those cases, controlled demolition is not overkill – it is the correct next step.
There is also a cost trade-off. Trying to save compromised drywall can delay proper drying and lead to bigger reconstruction costs later. Removing a limited section now is often cheaper than dealing with mould remediation and structural drying after the problem spreads.
Equipment that actually helps dry water damaged walls
Household fans and open windows may help with very minor moisture, but they are rarely enough for a water-damaged wall assembly. Effective drying usually requires a combination of high-velocity air movement and commercial-grade dehumidification.
Air movers accelerate evaporation from exposed materials. Dehumidifiers capture that moisture from the air and reduce indoor humidity. In tighter spaces, wall cavity drying systems can direct airflow into drilled openings behind drywall. HEPA-filtered air scrubbers may also be needed if there is concern about dust, odours, or mould spores during demolition or drying.
Heat can help in some scenarios, but it has to be controlled. Too much heat without proper dehumidification can worsen humidity inside the property and slow progress. The goal is balanced drying, not aggressive overheating.
How long does it take?
Most water-damaged walls take several days to dry properly under controlled conditions. Minor clean-water incidents may dry faster. More severe losses involving insulation, multiple wall cavities, or high indoor humidity can take longer.
The timeline depends on the material, the extent of saturation, the room temperature, and how quickly drying began. A wall affected by a small plumbing leak caught within hours is very different from a basement wall left wet over a weekend. This is why estimates based only on appearance are unreliable.
Drying is complete when moisture readings return to an acceptable range for that material, compared with unaffected areas of the property. Without verification, there is no way to know whether the wall is truly dry or just looks better.
Signs the wall may still have hidden moisture
Even after the visible damage improves, watch for warning signs. Persistent odours, peeling paint, staining, lifted baseboards, soft drywall, and recurring condensation can all point to trapped moisture. In some properties, the first sign of incomplete drying is mould appearing along trim lines, behind furniture, or inside closets on the opposite side of the wall.
If the water loss involved a ceiling leak that ran down into the walls, check lower levels too. Water follows gravity, but it also wicks sideways through materials. A small leak above can create a larger hidden drying issue below.
Should you handle it yourself or call a restoration team?
For a very small clean-water incident caught immediately, you may be able to dry the affected area yourself if you can open the wall assembly, remove trapped moisture, run proper dehumidification, and monitor moisture levels. Most property owners, however, do not have moisture meters, cavity drying equipment, or a safe way to assess contamination and hidden spread.
That is where professional restoration becomes less about convenience and more about risk control. Fast response limits secondary damage. Certified technicians know when drying in place is appropriate, when materials need removal, and how to document moisture conditions for a more defensible recovery process. For homeowners, condo boards, and property managers, that can reduce disruption and prevent repeat issues.
At CPR24 Restoration, this is exactly where urgent response matters most. A wall that is still wet tomorrow is not just a wall problem – it can become a mould, tenant, insurance, and reconstruction problem.
How to protect the wall after drying
Once the wall is dry, the job is not finished if the original cause remains unresolved. Plumbing defects need repair. Exterior drainage issues need correction. Roof and window leaks need proper sealing. In basements, waterproofing or foundation work may be part of the long-term fix.
Any removed drywall, insulation, trim, or flooring should only be rebuilt after drying goals are met. Reclosing a wall too early traps the problem inside. Good restoration is not about making the damage look gone. It is about making sure the moisture is actually gone.
If your wall has been wet for more than a few hours, act quickly, be realistic about what is hidden behind the surface, and treat drying as a technical process rather than a cosmetic one. That approach gives you the best chance of avoiding mould, unnecessary demolition, and a much bigger repair bill later.