Water Damage Restoration in Yorkville
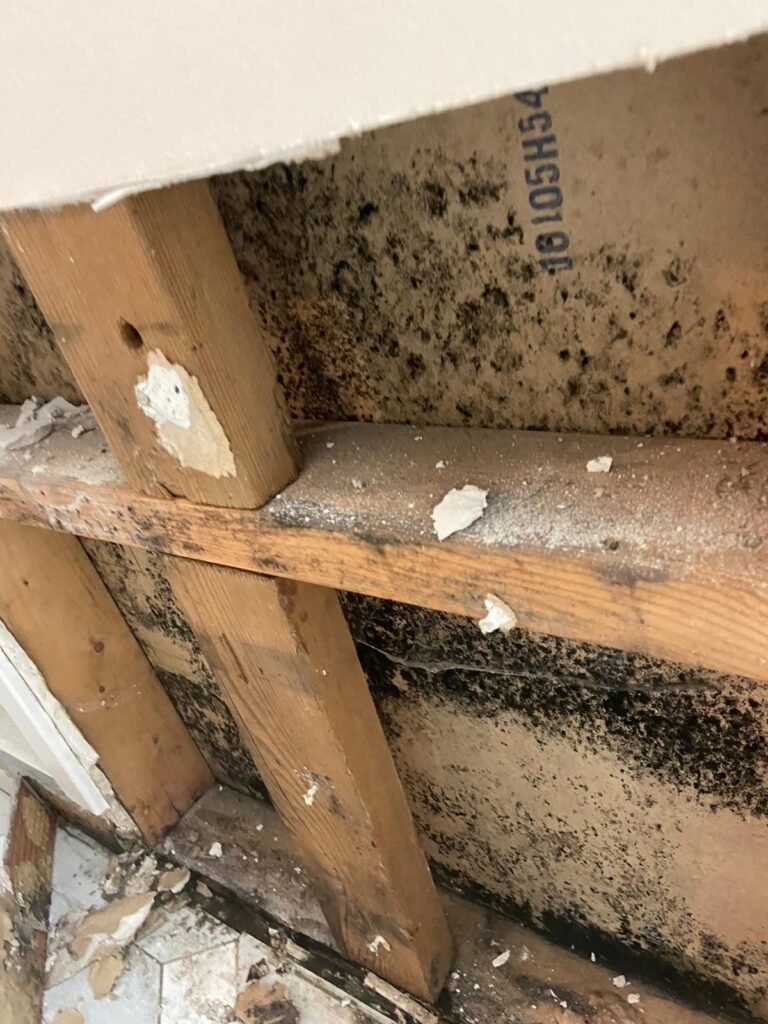
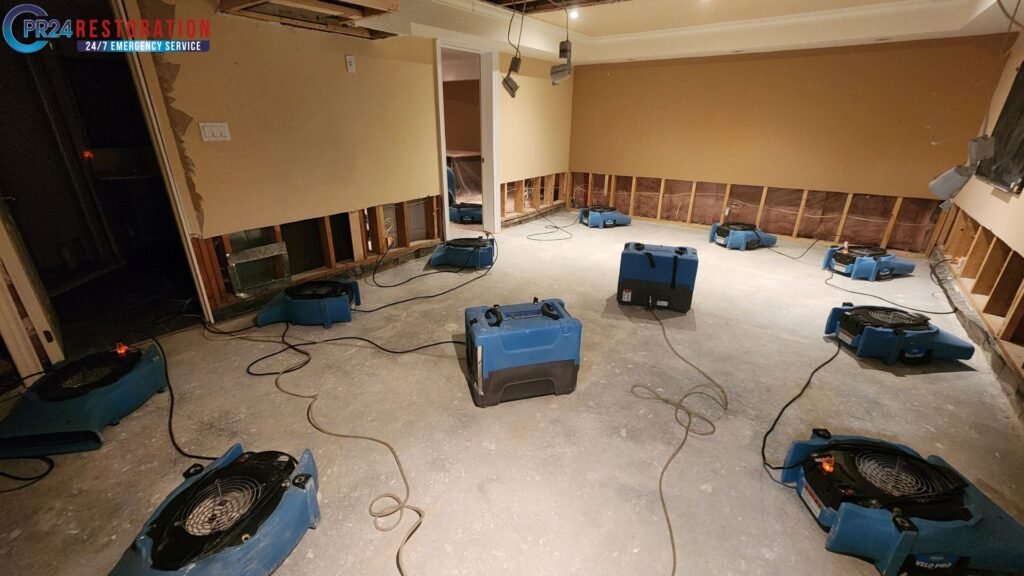
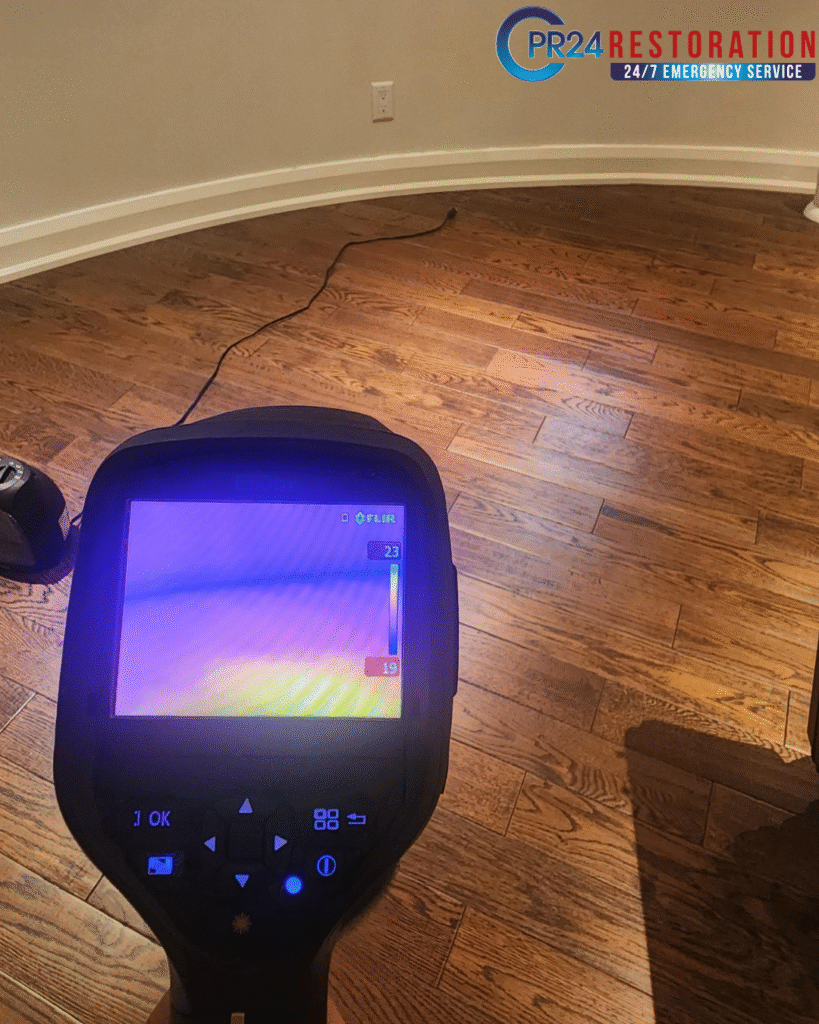
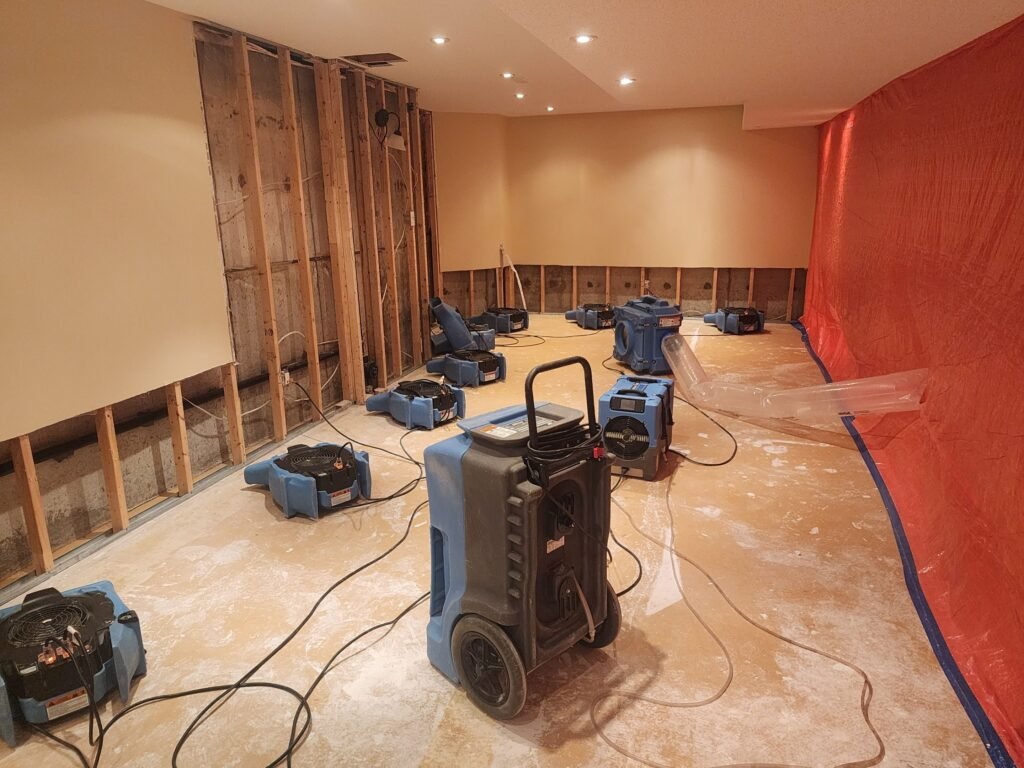
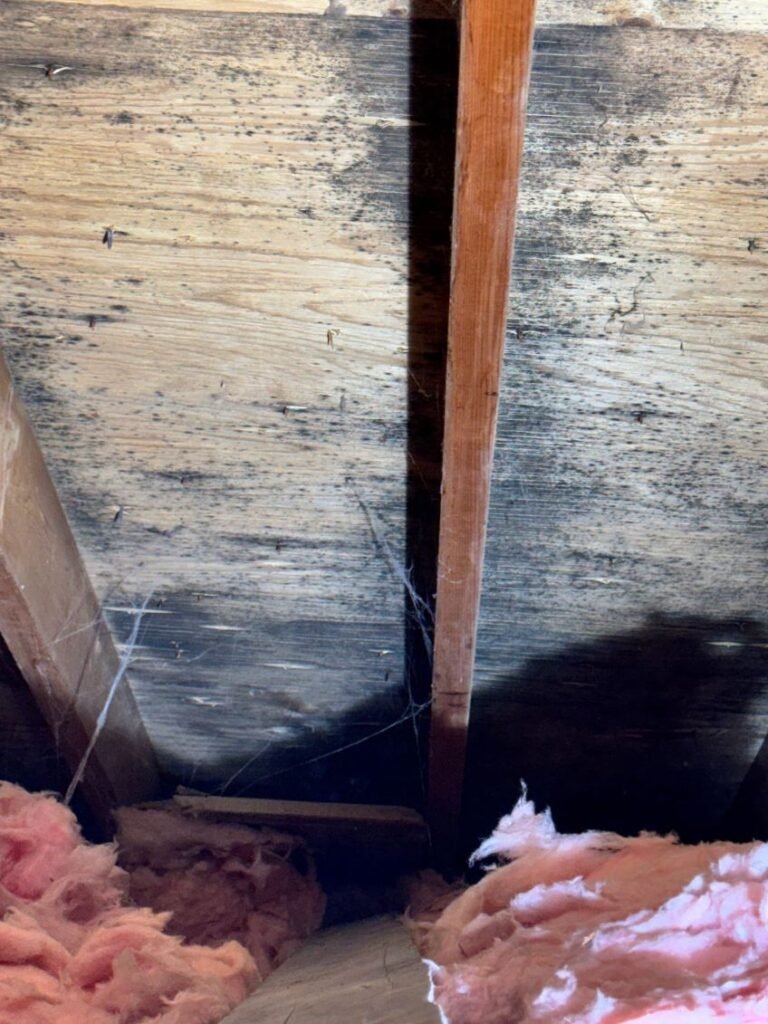
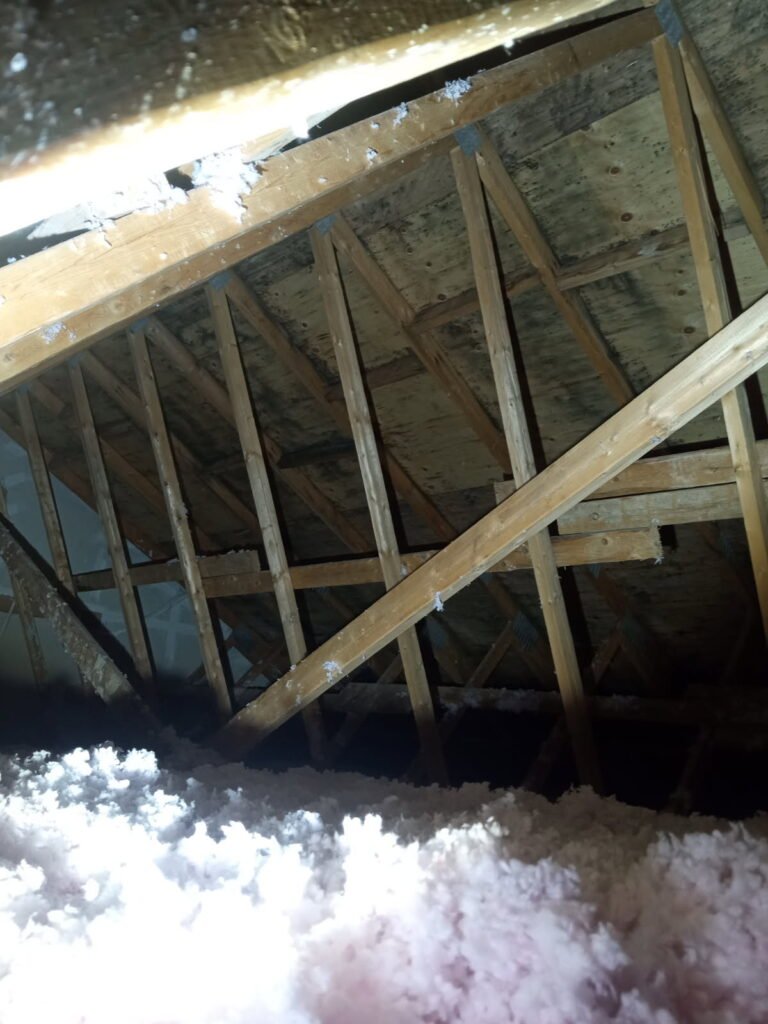
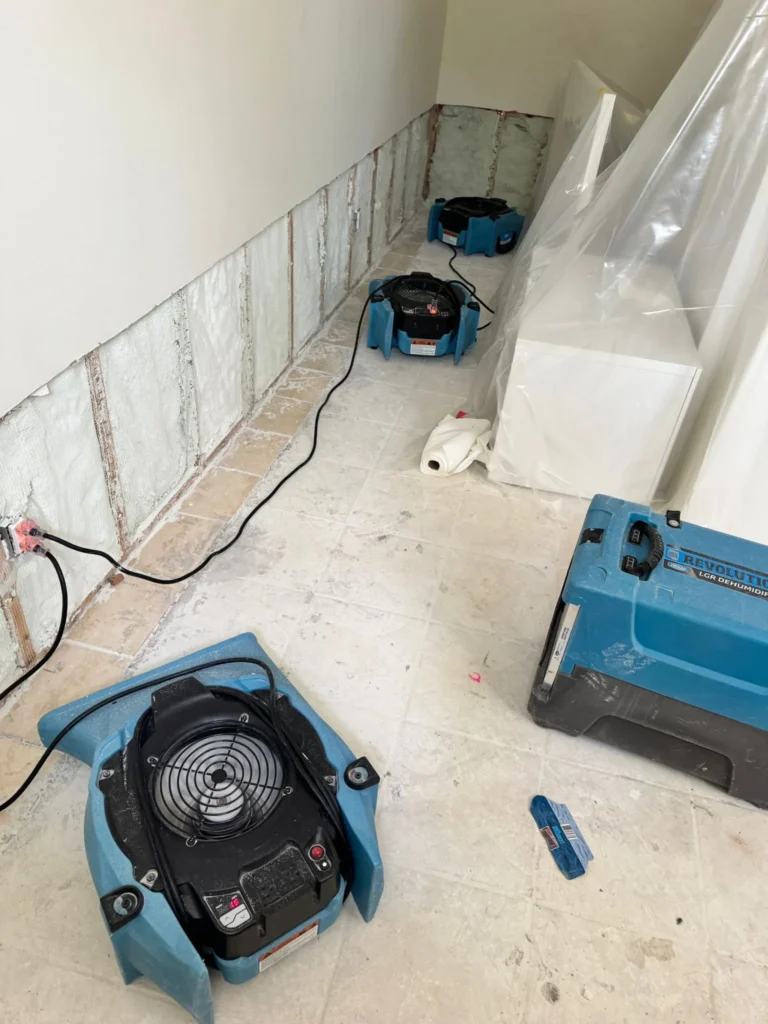
Water damage can strike unexpectedly, leaving homeowners and business owners in distress. In Yorkville, a lively neighbourhood with lovely homes and shops, water damage can be extremely harmful. This article delves into the intricacies of water damage restoration Yorkville, offering insights into prevention, response, and recovery strategies tailored for Yorkville residents. Whether it’s a small leak or a significant water inundation, CPR24 Restoration is the local expert. We provide 24/7 water damage restoration in the Greater Toronto Area. Understanding Water Damage Water damage refers to the destruction caused by the intrusion of water into areas where it can cause harm. This can occur because of various reasons, including: Types of Water Damage Water damage is categorized into three main types, each requiring different restoration approaches: Clean Water Damage: Originating from a clean source, such as a broken water supply line. While it poses minimal health risks, prompt action is essential to prevent further issues. Gray Water Damage: Involves water that may contain contaminants, such as from washing machines or dishwashers. It requires careful handling by IICRC certified technicians to avoid health hazards. Black Water Damage: The most severe type, stemming from sewage or floodwaters. It poses significant health risks and necessitates professional emergency water damage services for safe remediation. The Importance of Immediate Response When faced with water damage, time is of the essence. Delaying the response can lead to: CPR24 Restoration provides 24/7 water damage restoration in Yorkville. We ensure a quick and professional response when you need it most. Emergency Services in Yorkville Yorkville residents can benefit from emergency water damage services provided by CPR24 Restoration, ensuring a quick and efficient recovery. These services typically include: The Water Damage Restoration Process Restoring a property after water damage involves several critical steps: 1. Assessment and Inspection The first step in the restoration process is a comprehensive assessment of the damage. Professionals will: 2. Water Extraction Once the assessment is complete, the next step is to remove any standing water using specialized tools. This step is crucial in water damage restoration Yorkville: 3. Drying and Dehumidification After water extraction Yorkville, drying is vital to prevent mold growth and hidden damage: 4. Cleaning and Sanitizing Once the area is dry, cleaning and sanitizing are performed to eliminate bacteria and contaminants: 5. Restoration and Repairs The final step involves restoring the property to its pre-damage condition. This can include: CPR24 Restoration ensures that every property receives full restoration, whether it’s for homes or businesses. Preventing Water Damage in Yorkville While it’s impossible to prevent every water-related incident, proactive maintenance can minimize risks: Regular Maintenance Install Water Detection Systems Landscape Management Dealing with Insurance Claims Navigating insurance claims after water damage can be stressful. Here are some practical tips for Yorkville residents: Choosing the Right Restoration Company Selecting a reputable water damage restoration company Yorkville is crucial for long-term results. Here’s what to look for: Experience and Expertise: Choose a company with a strong reputation and proven success in flood cleanup Yorkville. CPR24 Restoration has years of experience handling complex water emergencies across Toronto and the GTA. Certifications and Insurance: Ensure the company employs IICRC certified technicians and holds full liability insurance. Choose a provider that offers all services. This includes emergency water damage. This way, you can have a smooth recovery from starting finishing. Affordability: CPR24 Restoration is known for its affordable water damage repair solutions without compromising quality. The Role of Technology in Restoration Modern technology has revolutionized the water restoration process, helping CPR24 Restoration deliver faster, more accurate results: Thermal Imaging: Detects hidden moisture behind walls and flooring, preventing future mold problems. Advanced Drying Equipment: Industrial dehumidifiers and air movers speed up drying, reducing the chance of secondary damage. Water Quality Testing: Determines the category of water involved, allowing precise selection of cleaning agents and restoration methods. Choose CPR24 Restoration Today! Water damage restoration in Yorkville is an important service. It helps protect homes and businesses from floods, leaks, and plumbing problems. Yorkville residents can protect their homes and health. They should understand the causes of water damage. Also, knowing the restoration process is important. Finally, they should learn how to prevent water damage. Whether dealing with basement water damage repair, burst pipe cleanup, or sewage backup cleanup, acting fast with CPR24 Restoration ensures a full recovery handled by trained IICRC certified technicians. From residential water damage repair to commercial water damage restoration, CPR24 Restoration provides comprehensive, affordable water damage repair solutions — making them Yorkville’s most trusted water damage restoration company Yorkville. When disaster happens, call CPR24 Restoration. We offer 24/7 water damage restoration. Our experts will help restore your property safely and quickly.