Author name: CPR24 Restoration

Uncategorised

How to Clean Black Mold

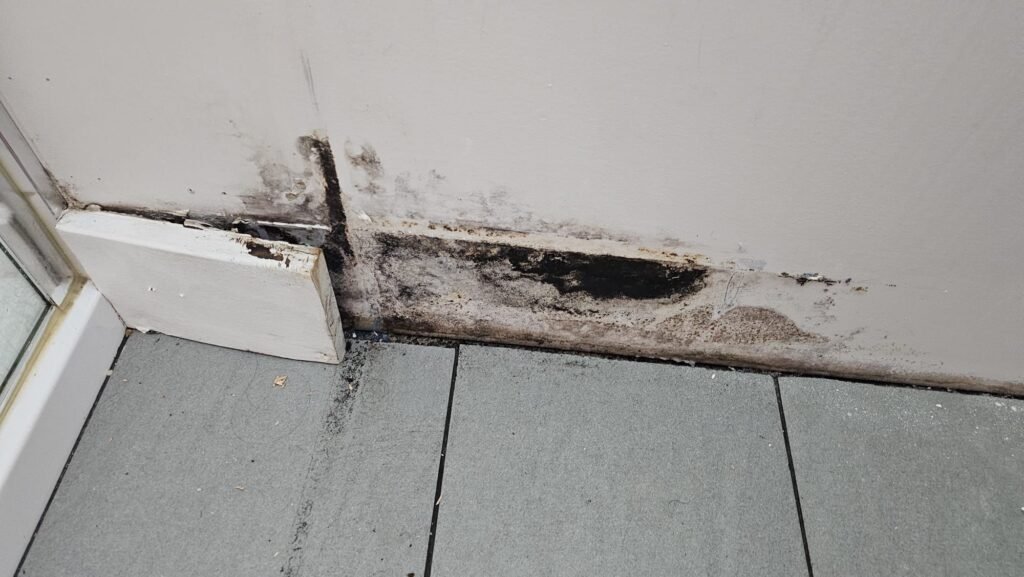
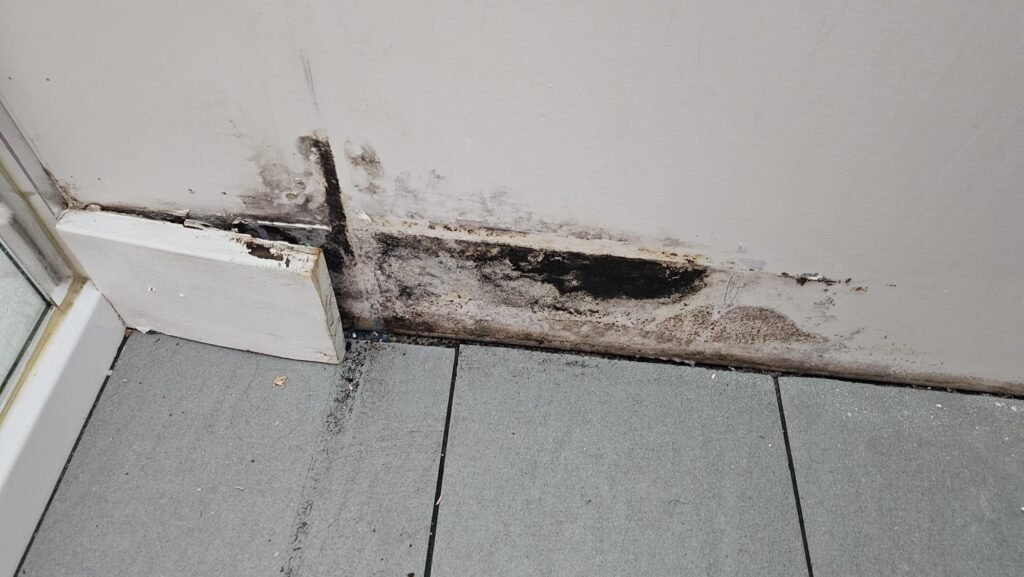
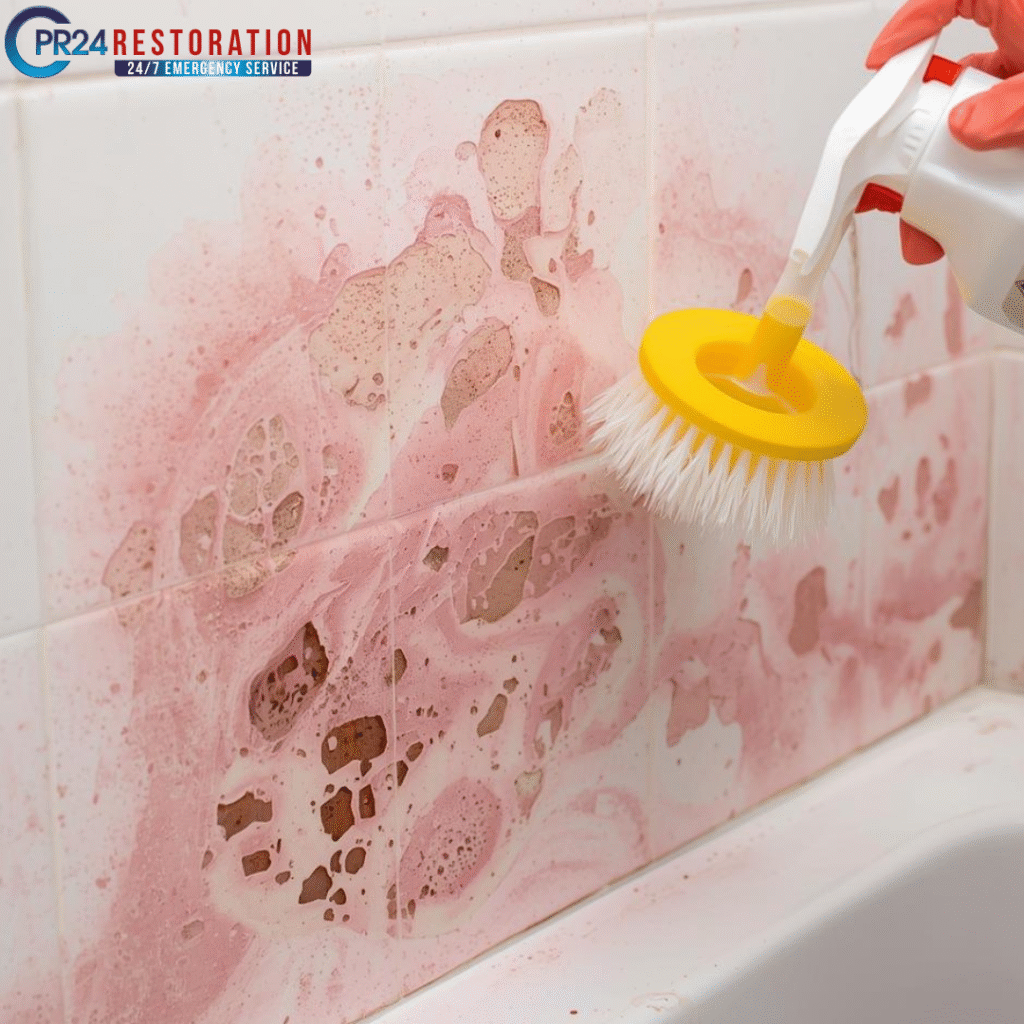
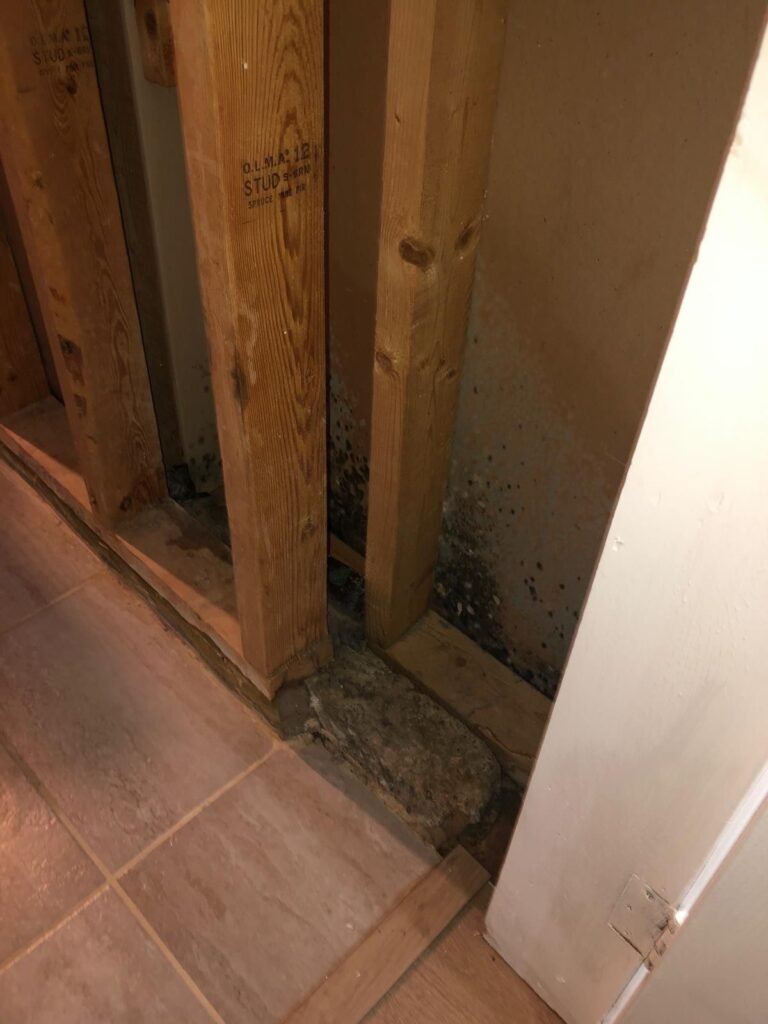
Toxic black mold can grow into large infestations within days, so it’s crucial to clean black mold promptly to prevent further spread. Quick action becomes crucial if you find black mold in your home. Those dark spots on walls or ceilings signal more than just an aesthetic problem. Your lungs and nervous system could suffer from extended black mold exposure. The feared black mold in most homes goes by the name Stachybotrys chartarum.  Many people reach for harsh chemicals, but vinegar works better than bleach to kill mold. White vinegar’s mild acidity makes it powerful enough to eliminate more than 80% of mold species. You can also fight black mold with common items like baking soda and hydrogen peroxide. This detailed guide shows you the safe and best way to clean black mold Toronto. We provide practical, step-by-step solutions to identify dangerous growths and stop future outbreaks. Our advice helps protect your home and health. Identifying and Understanding Toronto Black Mold What black mold Toronto looks like Black mold isn’t always black, despite what its name suggests. Most people discuss Stachybotrys chartarum (S. chartarum) as black mold, but you’ll see it in dark shades from greenish-black to dark brown. The mold creates circular, clustered patterns and feels either fuzzy or slimy to the touch. The fungus often leaves green stains on surfaces after you wipe it away. Moisture levels change the mold’s appearance. It looks wet and slimy during active growth but becomes dry and powdery once its water source runs out. You’ll notice a distinct musty smell that reminds people of rotting plants or damp paper. Common places it grows in homes Black mold runs on what experts call the “trifecta” – humidity, moisture, and poor airflow. The mold needs temperatures between 40-100°F (4.4-38°C) and organic materials with cellulose to feed on. Your bathroom tops the list of vulnerable spots, especially around shower stalls, tiles, and curtains. Basements and crawlspaces attract mold because of leaks, condensation, and poor ventilation. Kitchen areas create perfect conditions with sink moisture and food scraps. Other common locations include: Health risks of black mold exposure Research shows black mold isn’t more dangerous than other types, contrary to popular belief. In spite of that, exposure can trigger serious health reactions, especially in sensitive people. Most people experience allergic reactions that appear as congestion, watery eyes, sneezing, and skin rashes. Mold spores can trigger attacks or worsen symptoms in people with asthma. People with existing respiratory conditions, weakened immune systems, infants, and elderly individuals face higher health risks. A 2021 report reveals that England’s NHS spends about £1.4 billion yearly treating illnesses linked to damp housing. Note that mold exposure affects everyone differently. Some people might have severe reactions while others barely notice the same environment. Essential Tools and Safety Gear Black mold removal without proper protection puts your health at serious risk. Your safety equipment acts as the first defense against airborne spores released during cleaning. Protective clothing and masks Small cleaning jobs (less than 10 square feet) need basic protection with an N-95 respirator, gloves, and eye protection. Medium-sized areas that are 10 to 100 square feet need half-face or full-face air purifying respirators. These respirators should have P100 filter cartridges for better protection. Your hands need rubber gloves that extend to mid-forearm. Strong cleaning solutions work best with natural rubber, neoprene, nitrile, polyurethane, or PVC gloves. Your eyes need protection from goggles without ventilation holes to block spores from entering. Larger infestations demand full protective gear – disposable coveralls, head covering, and shoe coverings. Mold spores stick to clothing and can spread throughout your home, so you should seal disposable items in plastic bags after use. Ventilation and containment tips Good containment stops mold from spreading to clean areas of your home. Large mold remediation projects need sealed floors, pathways, and vents with plastic sheeting at least 6 mils thick. Negative air pressure within the contained area is vital – air should flow into the work area instead of out. A HEPA-filtered exhaust fan creates this effect. The plastic sheeting should bend inward on all surfaces if your containment works properly. Open windows help improve ventilation. Your HVAC systems should stay off during cleaning to prevent spores from circulating. Cleaning supplies checklist You’ll need these supplies before starting: People with respiratory conditions like asthma or a weakened immune system should not attempt black mold removal. Professional help remains the safest option in these cases. Step-by-Step Methods to Clean Black Mold You can control mold by managing moisture. Start cleaning black mold after identifying it and getting the right safety gear. Using hydrogen peroxide and baking soda A 3% hydrogen peroxide solution kills mold on both porous and non-porous surfaces. Just pour the undiluted peroxide into a spray bottle and spray it on moldy spots. Let it bubble for 10 minutes. Grab a soft brush to scrub the area and dry it completely. Tough mold spots need a paste made from 1 part hydrogen peroxide and 2 parts baking soda. Put this paste on the mold and wait 30 minutes before scrubbing it away. Cleaning with vinegar and tea tree oil White vinegar’s acidity kills about 82% of mold species. Spray it undiluted on moldy areas and wait an hour before wiping. Tea tree oil works great too, because of its antifungal properties. Mix a teaspoon of tea tree oil with a cup of water. Spray this solution on the mold and wait at least an hour before cleaning it off. When and how to use bleach safely People think bleach works best for mold cleanup, but that’s not true. It doesn’t work on porous surfaces and only removes stains instead of killing deep mold. In stark comparison to this, it works fine on non-porous surfaces like tile. Mix 1 cup bleach with 1 gallon water. Make sure the area has good airflow. Never mix bleach with ammonia or vinegar – it creates dangerous fumes. Surface-specific cleaning: wood, tile, vents Start with a detergent solution on wooden surfaces before using stronger cleaners. Tile and grout clean up nicely with baking soda paste or hydrogen peroxide.

Uncategorised

Certified Mold Removal Toronto

Professional mold removal needs expert knowledge to get rid of tiny spores floating through your home’s air. Certified mold removal is crucial because our 17 years in the field have shown us how these invisible particles affect Toronto homes and families. Since 2002, we’ve checked and cleaned thousands of properties. The numbers show the impact clearly. We have removed around 1.87 million pounds of materials affected by mold in Toronto & the GTA. Looking for certified mold removal companies nearby? Certified Toronto mold remediation goes beyond cleaning what you can see. Our certified specialists handle everything from the first inspection to complete mold removal. We ensure that both airborne and visible contaminants are removed. Toronto mold services cost between $4.00 to $6.00 per square foot, and many companies give free first inspections to check the problem. Our customers rate us 9.8 out of 10, which shows how well we take care of mold problems in Toronto homes. What causes mold growth in Toronto homes Mold grows easily in Toronto homes when specific conditions line up. You need to understand what causes mold to prevent it and know when you should call for certified mold removal. High humidity and poor ventilation Toronto’s climate creates perfect conditions for mold to grow year-round. Your home can get mold when indoor humidity is over 60%. This makes bathrooms, kitchens, and basements risky areas. Summer brings high humidity. Winter has its own issues as heating systems make indoor air stuffy and trap moisture. The biggest problem comes from poor ventilation. Stagnant, damp air traps itself without proper airflow, and mold colonies begin to form. Many Toronto homes lack proper ventilation systems in their bathrooms and kitchens where moisture builds up. Here’s what you can do to get better air circulation: Water leaks and flooding Water getting into your home is one of the main reasons mold starts growing in Toronto properties. Small water problems quickly become significant issues – mold starts growing just 24-48 hours after water exposure. Leaky roofs, plumbing problems, and poor drainage systems let moisture seep in. Emergencies like burst pipes or flooding can lead to toxic mold growth. This is especially true for black mold (Stachybotrys chartarum). Water damage does more than leave ugly stains. It weakens your home’s structure by damaging wood framing, drywall, and flooring if left untreated. You should contact professional toronto mold remediation services right after any water-related incident. Hidden moisture in walls and basements Hidden moisture problems lurk in many Toronto homes. Basements face the highest risk because they sit below ground level, making them easy targets for water to seep through foundation cracks. Older homes in neighbourhoods like Roncesvalles and The Annex face higher risks because: Watch out for warning signs like musty smells, peeling wallpaper, bubbling paint, and wall or ceiling discoloration. Even small patches of visible mold often point to bigger problems hiding behind walls or under floors. These hidden moisture issues need quick mold removal Toronto attention. If left alone, they can harm your home’s structure. They can also cause serious health problems, especially for people with breathing issues or allergies. How certified mold removal works Professional mold remediation uses a systematic approach that will give a complete elimination of harmful spores. Qualified technicians perform multiple steps. They understand proper containment and removal techniques. Original mold inspection and testing A detailed assessment marks the beginning of creating a mold-free environment. Certified inspectors look for visible mold and potential moisture issues. They use specialized tools like moisture meters and infrared cameras to detect hidden mold. Air quality tests (AQT) or swab testing are important for finding hidden mold. They help identify the types of mold and how serious the contamination is. Qualified experts should handle this significant step. Premature disturbance of affected areas can create secondary contamination. Creating a mold remediation plan Our IICRC-certified technicians develop a detailed scope of work that outlines every remediation step after inspection. This document has: The plan takes into account all occupants’ health and safety throughout the remediation process. Building occupants receive notification about the timeline and precautions before work begins. Safe removal using certified methods Organizations like IICRC and EACO set the standards for proper mold removal. Effective remediation needs: Technicians first block off affected areas using plastic sheeting. They also use negative air pressure machines with HEPA filters to stop cross-contamination. They then remove contaminated materials physically—surface cleaning alone won’t work. Finally, they use specialized cleaning methods, including HEPA hoovering and antimicrobial treatments. Remediation work should happen after normal business hours to reduce exposure risks for building occupants. Post-removal air quality testing Toronto Post-remediation air sampling confirms if removal procedures worked. Independent third-party laboratories analyze these samples to ensure unbiased results. Homeowners gain confidence in their mold-free environment through this verification process. Testing can detect microscopic spores that may hide. Additional testing months after remediation helps confirm that original infestation conditions haven’t returned. Why hire certified mold removal specialists Professional mold removal specialists give you major advantages compared to DIY solutions for mold problems in your Toronto home. A good understanding of these benefits helps you make smart choices about mold cleanup. Trained and licensed professionals Certified mold specialists in Toronto get their credentials through tough training from respected groups. These experts pass certification courses and exams to prove their deep knowledge of mold types and treatment methods. Use of industry-standard equipment Professional Toronto mold removal companies employ specialized tools that regular homeowners can’t access: This advanced equipment makes the cleanup process faster and removes mold completely. Compliance with health and safety regulations These specialists strictly follow the Ontario Health and Safety Act and guidelines from groups like EACO. Section 25(2)(h) of the Occupational Health and Safety Act requires employers to protect their workers properly. Expert teams use proper containment methods with negative air pressure and HEPA filtration to prevent mold from spreading. They wear the right protective gear during cleanup to keep everyone safe – both workers and residents. Working with certified specialists gives you peace of mind. You know that you handle your mold problem the right way by following all proper steps. Cost and timeline of mold remediation

Uncategorised

What to do when your basement floods

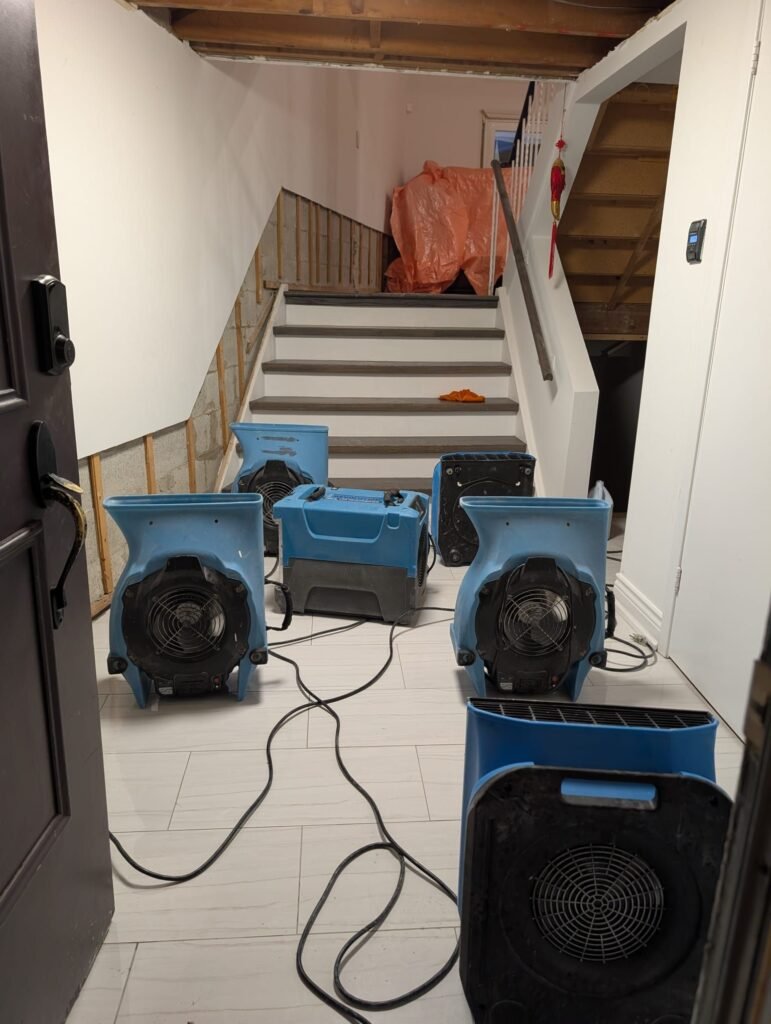
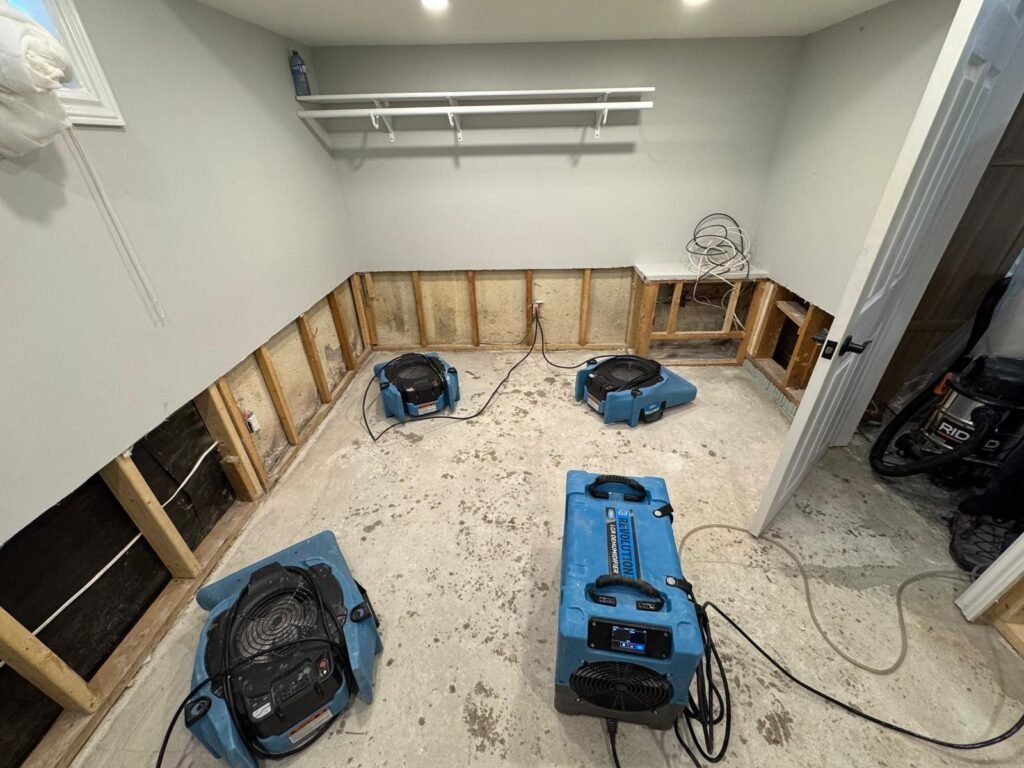
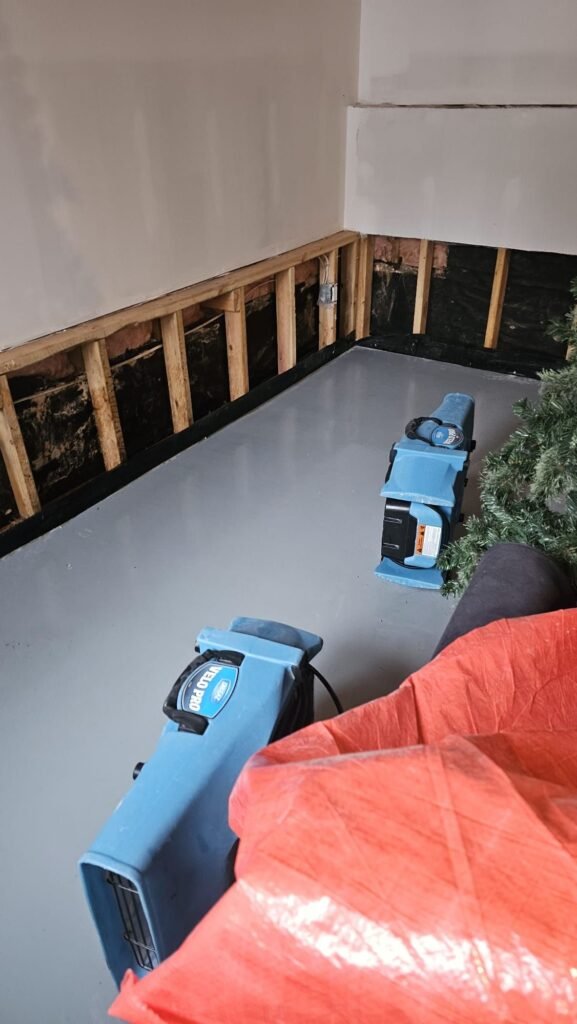
Basement flooding in Toronto can strike any home with a basement, regardless of its flooding history. This unexpected disaster affects thousands of homeowners each year. Property damage and health hazards often follow in its wake. Quick action is crucial because your home’s furnishings must dry within 48 hours to prevent mould growth. Floodwater carries harmful chemicals and bacteria unless it comes from a clean source like a broken supply line. Your family’s health can be at risk from these contaminants. They can spread disease, cause allergic reactions, and damage materials even after the flood has gone. This guide outlines the exact steps you need when your basement floods. You’ll learn everything from safety protocols before entering to proper flood cleanup methods and prevention strategies. This information helps you reduce damage and keep your family’s health safe. Useful for current flooding or future events. Ensure Safety Before Entering the Flooded Basement Your safety comes first with a flooded basement Toronto. You should call a qualified professional as soon as you find flooding. They can check if it is safe to go inside. Flooded basements can be very dangerous. Check for electrical hazards Water and electricity make a deadly mix. You risk severe shock if you step into a flooded basement while the power is still on. Stay out if the water level has gone above electrical outlets, baseboard heaters, or your furnace. Let your electric company turn off the power at the meter. This is safer than trying to reach your breaker box through water. Watch for gas leaks or strange smells Gas leaks create one of the most important dangers during basement flooding Toronto. You need to call your gas company immediately. This is important if flood water is near gas equipment. This includes furnaces, water heaters, or stoves. Look out for these warning signs of a gas leak: Leave your home immediately and call 911 from outside if you smell any gas. Wear protective gear before entry Flood water usually contains sewage, bacteria, and harmful chemicals. You need proper protection to stay safe. Put on waterproof rubber boots to prevent electrical shock before entering a flooded basement. You should also wear rubber gloves, safety glasses, and a face mask to guard against contaminated water. Keep children, pregnant women, and people with breathing problems away from sewage-contaminated materials. Look for signs of structural damage Flooding can damage your home’s structure in some cases. Check your walls for discolouration, puffiness, or other signs. Weak floors or walls might give way, so you should talk to a professional if you notice anything concerning or feel unsure. Note that basement flood water might contain sewage from the sanitary sewer. This water has bacteria and viruses that could make your family sick. You must wash thoroughly after any contact with flood water. Identify the Source of the Flooding You need to locate where the basement flooding starts, clean up properly, and stop it from happening again. First, find exactly where the water comes from. Burst pipes Toronto vs. sewage backup Toronto The way you handle the problem depends on whether you’re dealing with clean water from burst pipes or contaminated sewage. Clean water from burst pipes or water supply lines looks clear. A sewer backup Toronto creates thick, black water with contaminants and viruses that can be dangerous to your health. Sewage usually backs up when something blocks the sewer lines and stops wastewater from flowing through the drainage pipes. This happens because of things stuck in the line (rags, paper towels, disposable wipes, grease buildup). Tree roots can also break into pipes, and collapsed sections let backfill material get inside the line. Check if flooding is from outside or inside The solution becomes clear once you know if water comes from inside or outside your home: Inside sources: Outside sources: You should also look for white, chalky residue (efflorescence) on walls. This usually means water seeps through foundation cracks. How to shut off the water supply safely A burst pipe inside means you should turn off the main water valve right away to limit damage. Most homes have this valve in the basement near the front or in the water heater room. Just turn it counterclockwise to stop the water flow. If sewage causes the flooding, don’t flush toilets or use appliances with drains – this makes things worse. The best thing to do is call your city’s water services (usually 311) to help figure out and fix sewer problems. Basement Flood Cleanup & Drying Process Toronto Quick action to remove water becomes significant after identifying the source and ensuring safety. Your house and furnishings have a lower chance of developing mold if dried within 48 hours. Remove standing water using pumps or vacuums A wet/dry vacuum works well with small amounts of water. You must rate the vacuum for wet use, and you should empty it frequently to prevent overflows. You can place a sump pump at the basement’s lowest point to extract maximum water during deeper flooding. Water may accumulate in concealed areas like behind appliances or under stairs, so check these spots carefully. Professional services with powerful pumps might serve you better during severe flooding. Dry out the space with fans and dehumidifiers Mold growth stops with rapid drying. You should position fans near windows or doorways to push damp air outside. Dehumidifiers should run continuously to extract moisture from the air. The doors and windows can stay open when outside weather allows, during low humidity and moderate temperatures. Otherwise, dehumidifiers remain your best option. Space heaters can help warm the air and speed up moisture evaporation. Disinfect surfaces and remove damaged items You need to determine whether you have clean water or sewage-contaminated water first. Hard, nonporous surfaces need a bleach and water solution. Mix 1 cup of bleach with 5 gallons of water. Let it sit for 6 minutes before rinsing. Flood-soaked flooring requires removal and disposal. The same applies to drywall and insulation contaminated with sewage or flood waters. Handle contaminated water with extra care Flood water

Uncategorised

Mold Removal Thornhill

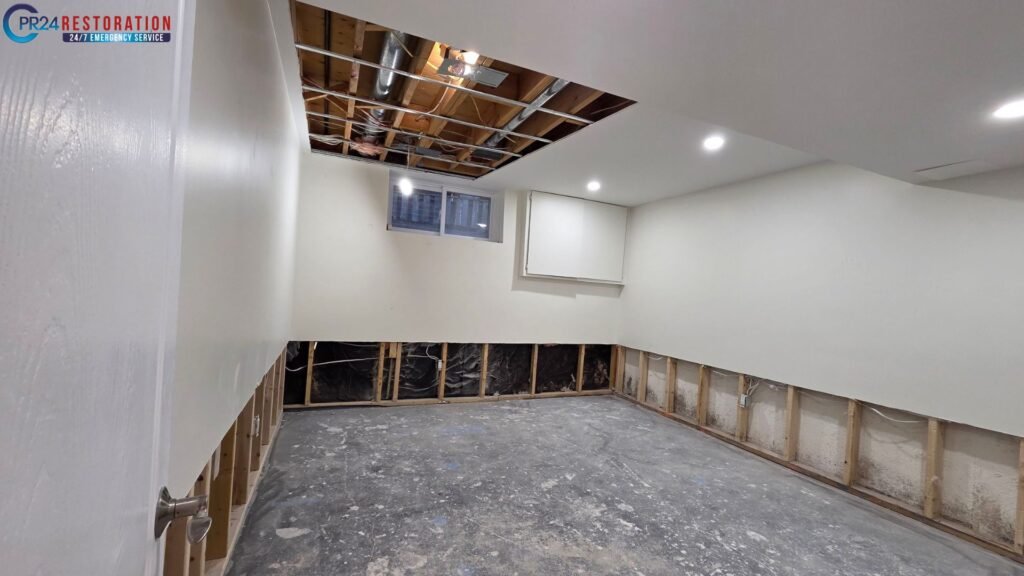
Our IICRC-Certified mold removal services in Vaughan and Thornhill are very important. Mold exists everywhere, even if you don’t see it. Mold spores multiply into millions and become airborne during incorrect removal attempts, while undisturbed mold releases minimal airborne spores. Mold exposure can be extremely harmful. It poses serious health risks to young children, older adults, and people with weak immune systems or breathing problems. Residents of mold-affected homes often suffer from multiple health issues. These include rashes, sickness, allergies, asthma, headaches, and general weakness. Mold exposure over time can cause lung infections. It can also lead to severe coughing or wheezing. People may experience irritation in their eyes, nose, and throat. Nausea is another possible effect. Your health faces greater risks the longer mold continues to grow indoors. This piece will walk you through the essentials of professional mold removal in Thornhill. Signs You Might Need Mold Removal in Thornhill You can save yourself from major damage and health risks by spotting mold problems early in your Thornhill home. Mold spores are natural. They spread in certain conditions. We see this mostly in hot, humid, dark places with little airflow. Visible mold on walls, ceilings, or floors You’ll know you have a mold problem when you see it growing on surfaces. Watch out for dark spots, odd colours, or fuzzy patches that appear on your walls, ceilings, floors, or near windows. Black mold usually appears as large black stains and feels either slimy or fuzzy when you touch it. Your bathrooms, kitchens, and basement need extra attention since mold loves these spots. Look for peeling paint, wrinkled wallpaper, plaster cracks, or white crystal-like spots on walls. These signs show there may be moisture problems underneath. Musty or earthy odours in certain rooms That musty smell you can’t get rid of might be your first clue that mold is growing somewhere hidden. The numbers tell us that 60% of mold problems start with these musty odors. Many people say it smells like a damp forest floor and it often makes them sneeze. Research shows that following your nose is actually more reliable than looking for visible mold. You should ask more questions if this smell hits you, especially when you have enclosed spaces like basements or attics. Unexplained health symptoms like coughing or rashes Mold can make you sick in many ways, and some people are more at risk than others. Watch for coughing, wheezing, stuffy nose, irritated eyes, skin rashes, and headaches. The risk is higher for people with allergies, breathing issues, and chemical sensitivities. It also affects seniors, pregnant women, babies, and anyone with a weak immune system. Living with indoor moisture and mold for a long time can lead to asthma, bronchitis, and other breathing problems. Recent water damage or flooding in the home Mold starts growing just 24-48 hours after water damage, so you need to act fast. Leaks, floods, or high humidity create perfect conditions for mold to grow. Damp spots in your home from leaks or poor airflow become mold’s favorite places. After water damage, check your property for moisture problems. Look for stains and discolouration. Also, sniff for musty smells. What to Expect During a Mold Inspection in Thornhill Professional mold inspections help identify harmful growth in your Thornhill home. You should know what happens during this process to prepare for this vital step toward a healthier living environment. Original visual and thermal assessment Certified mold inspectors start with a complete visual evaluation when they arrive at your property. Most professionals come in unmarked vehicles to protect your privacy. They check high-risk areas like basements, bathrooms, and attics for visible signs of mold growth. The inspection looks for water stains and discolouration on floors, walls, ceilings, and carpets. These experts use new technology like thermal imaging cameras. These cameras help find temperature changes that may indicate moisture issues behind walls or above ceilings. Identifying moisture sources and hidden mold Finding the root cause of mold growth is essential for a lasting solution. The inspectors use special tools like radio frequency gauges, fibre optics, and moisture meters to find hidden dampness. They get into walls, ceilings, floors, crawlspaces, and ventilation systems carefully. This detailed work helps pinpoint what’s feeding the mold growth – whether it’s leaks, condensation, or poor ventilation. Creating a scope of work and quote The professionals develop a detailed action plan after the assessment. Their report shows specific findings, recommendations, and a step-by-step remediation strategy. This document has the containment requirements, needed equipment like HEPA air scrubbers, and an estimated timeline. The scope lets you understand exactly what will happen during remediation so you can plan. Third-party air quality testing Thornhill Air quality testing proves mold presence best, especially when you can’t see the growth. Professional inspectors take air samples that accredited laboratories analyze. These tests show the types and amounts of mold spores in your home. The lab results provide legal documentation with individual identification numbers that ensure reliability. Some companies also test surfaces to identify specific mold species for proper remediation. Understanding the Thornhill Mold Removal Process Our certified mold removal follows several key steps that eliminate contamination and prevent it from spreading. Remediation crews stick to strict industry protocols to keep everyone safe during this sensitive process. Setting up containment zones The first step creates proper containment barriers. These sealed zones stop mold spores from reaching clean areas of your home. A single layer of 6-mil fire-retardant polyethylene sheeting works well for areas between 10-100 square feet. Larger spaces need full containment with double polyethylene layers and special chambers to enter and exit. You retain control through negative pressure in these zones. The polyethylene sheeting should billow inward on all surfaces, suggesting proper containment. Using HEPA filters and air scrubbers Specialized equipment cleans the air next. HEPA (High-Efficiency Particulate Air) filters catch 99.97% of particles as small as 0.3 microns, including most mold spores. Air scrubbers release purifying agents into the space and neutralize pollutants right at their source. These machines filter air while creating negative pressure. They pull contaminated air through filters before releasing clean air. The devices

Uncategorised

Water Damage Restoration Thornhill

Your property needs quick water damage restoration when unexpected flooding strikes in Thornhill. Quick action prevents serious structural damage and health risks when water invades your home or business. PuroClean understands how stressful water emergencies can be for homeowners and business owners. Our team brings 15 years of restoration expertise to Thornhill, Ontario. We arrive at your property within 45 minutes during water emergencies. Our 24/7 emergency response team handles flooded basements Thornhill, sewer backups Thornhill, burst pipes Thornhill, and all flood services Thornhill. We are part of a network with over 400 offices in North America. This helps us find a lot of expertise for every water damage project in Thornhill. This blog explains our detailed approach to Thornhill water damage restoration. You’ll learn about common issues affecting Thornhill properties and steps to protect your investment. Common Causes of Water Damage in Thornhill Thornhill homeowners face special water damage issues. This is due to local weather patterns and the design of their infrastructure. They need to know why these issues happen to prevent damage and act quickly when problems arise. Burst pipe Thornhill in the winter months The cold winters in Ontario can cause pipes to burst. This happens when temperatures change quickly, making pipes freeze and break. Pipes can freeze when temperatures drop below 15 degrees Celsius. Water supply lines connected to outdoor equipment like garden hoses, sprinkler systems, and swimming pools break easily. Pipes near outside walls, crawl spaces, or attics need proper insulation. Local plumbers say that waiting too long to fix frozen pipes can get pricey and cause major property damage. Sewer backup Thornhill issues in older homes Sewer problems are a major concern for residents in Thornhill’s 50-year-old neighbourhoods. These backups occur when lateral pipes that connect homes to city sewer lines trap wastewater. The problems get worse during heavy rains as flood drains back up and force water through floor drains. Older homes face more risks because their pipes often break or clog. The August 2005 storm showed how bad things can get – 37 homes had basement drain backups, and 18 of them dealt with raw sewage. Appliance leaks and plumbing issues Flood damage Thornhill often comes from household appliances and plumbing that slowly wear down or suddenly break. A leaky faucet or running toilet wastes up to 200 gallons daily, which doubles what a family normally uses. Watch out for slow drains, bad smells, toilet problems, and gurgling sounds from drains. Most water loss inside homes happens because of broken fixtures and pipes. The City of Vaughan calls these “accidental leaks” that lead to shocking water bills. Flood damage Services Thornhill Storms have hit Thornhill hard over the years. The area saw three 100-year storms in 2005, 2013, and 2017 that overwhelmed drainage systems. The August 2005 storm dumped 103mm of rain in just one hour, with some areas getting up to 175mm. South Thornhill residents faced $5.57 million in damage from this storm alone. Homes in low-lying areas like the Aileen-Willowbrook neighbourhood face higher risks during heavy storms. Roads, catch basins, and stormwater systems often flood when too much rain falls too quickly. Emergency Water Damage in Thornhill Water disasters in Thornhill need quick professional help to avoid major reconstruction costs. Local restoration companies provide emergency services that minimize damage and start the recovery process right away. 24/7 emergency response availability Water damage doesn’t wait for business hours. That’s why Thornhill restoration services keep emergency response teams ready around the clock. Local companies provide help at any time of day or night. You can expect teams to arrive at your property within 45 minutes after your call. Quick action substantially reduces water damage and repair costs in Thornhill. The first 24-48 hours after water exposure are vital to prevent structural damage and mold growth. Original damage assessment and containment Restoration specialists start with a complete assessment to understand the damage scope. They check the water source, look at affected areas, and determine contamination levels (clean, gray, or black water). The team takes immediate steps to stop water from spreading. This might require emergency electrical work, temporary plumbing fixes, or securing your property against further damage. Teams document everything with photos, videos, and written reports that help with insurance claims. They make custom plans to fix your property after an emergency. They also list steps to return it to its original state. Water extraction and moisture detection Thornhill Thornhill’s modern water damage restoration uses advanced technology to remove water quickly. Teams use strong pumps, wet vacuums, and special tools to remove standing water from carpets, floors, and basements. They use thermal imaging cameras and infrared technology to find hidden moisture that regular inspections might miss. These detection systems find water hidden in walls, ceilings, and under floors. Moisture in these areas can cause damage or mold growth. After extraction, powerful air movers and industrial dehumidifiers remove remaining moisture. This creates conditions that stop mold growth and prepare the space for cleaning and repairs. Step-by-Step Thornhill Water Damage Restoration Process Our IICRC-Certified Thornhill water damage restoration company uses a step-by-step approach to restore properties to their original condition. Thornhill restoration experts use proven methods that reduce potential risks and help properties recover fully. Inspection and damage evaluation Our IICRC-Certified technicians start with a detailed assessment of the property. They find the water source. They decide the damage type: clean, gray, or black water. Then, they make a custom restoration plan. The technicians take photos and measurements of all affected areas. This documentation helps with insurance claims and provides accurate timelines and cost estimates for full recovery. Water removal Thornhill The team uses powerful pumps and industrial vacuums to remove standing water after completing the assessment. They move furniture and affected items to prevent further damage. Advanced moisture detection tools like infrared cameras and hygrometers find hidden water in walls and subflooring. The team then uses industrial dehumidifiers and specialized air movers to speed up moisture evaporation. This creates conditions that stop mold growth and prepare surfaces for cleaning. Thornhill Cleaning and

Uncategorised

Emergency Flood Damage Help

Time becomes precious at the moment flood damage help turns into an urgent need. The Greater Toronto Area has serious flooding problems, often requiring urgent attention to emergency flood damage. This is especially true in cities like Toronto, Mississauga, Brampton, Vaughan, and Oakville. Today’s aging infrastructure struggles to handle the massive water volumes from heavy storms. Emergency flood damage restoration services in Toronto guarantee quick response times between 45 minutes to 1 hour. Flooding creates potential risks as water carries dangerous waterborne diseases. Our Toronto flood restoration solutions can fix any size flood damage within 24 hours. This resource will help you handle this stressful situation with confidence. You can find help for basement flood damage repair or emergency flooding services. Understanding the Urgency of Flood Damage in Toronto Why every minute counts in a flood emergency Floods are Ontario’s deadliest natural hazard, causing massive damage and disrupting communities. Weather-related insurance payouts have doubled every five to ten years since the 1980s. Weather-related spending shows that flood damage makes up 75% of all claims nationwide. Your home faces a race against time during a flood emergency. Mold starts growing within 24 hours of water exposure. This turns a simple flood cleanup into a complex restoration job. Clean water becomes contaminated after 48 hours. This raises both health risks and flood cleanup costs. Water sitting in your Toronto home causes more damage by the hour. The costs can triple between 24-48 hours. Building materials break down so badly that they need replacement instead of repairs. Health and structural risks of delayed action Waiting too long for help with flood damage creates dangerous health hazards. Standing water becomes a perfect breeding ground for harmful microorganisms. People exposed to contaminated floodwater might suffer from: Your home’s structure starts falling apart faster than you’d think. Water seeps into walls first and makes drywall swell and warp. Wooden structures bow and crack as moisture keeps seeping in. The worst cases can damage your foundation. Insurance might not cover all repairs if you wait too long to call Toronto flood restoration services. How Toronto’s climate increases flood risk Toronto’s climate changes have made flood risks worse over the last several years. The July 2024 floods caused CAD 1.39 billion in insured damages. This shows just how serious the threat has become. Climate change makes storms more severe and frequent. This problem keeps getting worse. Toronto’s growth has removed natural safeguards like wetlands and forests that used to soak up heavy rainfall. Most rainfall in the GTA now turns into surface runoff that overwhelms drainage systems. The city’s aging infrastructure makes everything harder. Old systems can’t handle today’s intense storms. Toronto needs CAD 36.23 billion in infrastructure repairs and is more than 10 years behind schedule. This makes professional flood damage restoration services crucial for Toronto homeowners. Step-by-Step Emergency Flood Restoration Process Professional flood damage help follows a clear approach to restore your Toronto home after water damage. Let’s look at each phase to help you understand what happens during this challenging time. 1. Original inspection and moisture detection The restoration starts with getting a full picture of your water damage. Certified technicians use special tools like moisture meters, thermal cameras, and hygrometers to find moisture in your home. This crucial step finds both visible and hidden water damage that helps technicians create a targeted restoration plan. The team documents moisture levels in affected materials to track drying progress throughout the flood cleanup. 2. Water extraction and removal The team starts removing standing water quickly after the assessment. Professional flood damage restoration services in Toronto use strong submersible pumps and industrial vacuums. These tools can handle thousands of gallons each hour. They use portable wet vacuums and specialized water claws on carpets and flooring to stop delamination and warping. Quick water removal matters because porous materials can hide moisture for hours after visible water disappears. 3. Drying Processes and Water Removal The drying phase begins once the team removes standing water. They place industrial air movers and dehumidifiers strategically to eliminate remaining moisture. This process targets obvious and hidden dampness in walls, under flooring, and inside structural cavities. The team checks moisture levels daily and adjusts equipment to ensure the best drying results. Complete drying usually takes several days based on damage extent. 4. Disinfection and mold prevention Sanitization becomes vital after surfaces are dry. Floodwater often contains harmful substances like bacteria and sewage. The team cleans and disinfects all affected surfaces with specialized antimicrobial treatments. This step removes odours and stops mold growth that can start 24-48 hours after flooding. 5. Restore your home The final phase fixes and rebuilds damaged structures. Your home might need new drywall, insulation, flooring, and other materials. This is a chance to improve your home with flood-resistant materials. You can use waterproof insulation, moisture-resistant drywall, and better drainage systems. Good structural repairs bring your home back to its original state and make it stronger against future water damage. Key Services Offered by Flood Damage Experts Toronto’s flood damage experts deliver detailed flood damage solutions for water-related emergencies in homes. These specialized services tackle both urgent issues and recovery needs over time. 24-hour flood service availability Leading restoration companies guarantee emergency response any time of day. Their teams usually arrive at your home within 45 minutes to 1 hour after you phone call. Quick action stops additional damage and keeps restoration costs down. Teams stay ready with industrial-grade equipment during holidays and weekends. They step in quickly whenever time disaster strikes. Basement flood damage cleanup Professional basement flood services use thermal imaging and specialized equipment to detect hidden moisture pockets. The core team uses submersible pumps, gas-powered extractors, and industrial dehumidifiers that remove water quickly. The process ends with structural drying techniques to stop any secondary damage. Sewage backup and odour removal Sewage backups create health hazards that get worse over time. Expert technicians follow multiple steps to fix the problem. They contain affected areas, block air vents, remove contaminated water, and apply eco-friendly disinfectants. Air scrubbers clean surrounding spaces, and special deodorization methods eliminate stubborn odors. Content restoration and storage Content restoration

Uncategorised

Attic Mold Inspection Toronto

Toronto homeowners need attic mold inspection because mold starts growing within 48 hours of moisture exposure. Attics face a higher risk of mold outbreaks when condensation builds up from rain, moisture, ice, and heat. Our company’s mold removal requests in Toronto have increased over the last several years. Our team’s 17 years of experience in mold inspection and removal services help us address your home’s mold concerns. Toronto’s certified mold removal costs between $4.00 and $6.00 per square foot. Many companies provide free assessments to check the problem. Your attic’s yearly mold inspections are a great way to get information about potential issues before they become severe. This blog covers all you need to know about attic mold inspection in Toronto. It includes early warning signs, certified testing, and affordable removal methods. Why Attic Mold is a Growing Concern in Toronto Toronto homeowners deal with unique challenges when their attics develop mold. Mold growth in Toronto attics isn’t just possible—it’s a constant threat that needs regular monitoring and proactive checks. Toronto’s climate and attic conditions The city faces extreme weather patterns all year that create perfect conditions for mold to thrive. Toronto has hot, humid summers and cold, wet winters. This creates a perfect environment for moisture problems in attics. Cold winter months create a huge temperature difference between warm indoor air and cold attic surfaces. This causes condensation when these air masses meet. Ice dams also tend to form during winter and force water under shingles into attic spaces. Summer brings its own problems. The city’s high humidity makes it hard for moisture to evaporate. The hot summer sun heats roofing materials and creates thermal cycling that pushes moisture into attic spaces. The changing seasons and high humidity make Toronto’s attics extremely prone to mold growth. Why is it most common for mold to grow in attics? Attics top the list as the most common places for mold to grow, and with good reason, too. We found these areas filled with materials. They included wood beams, cardboard boxes, and some types of insulation. The insulation can easily soak up moisture. These materials become perfect food sources for mold. Most homeowners rarely check their attics. Water damage signs often go unnoticed until stains or musty smells appear in other parts of the house. Mold can grow hidden for years, which makes cleanup much harder and can get pricey by the time someone finds it. Common signs of attic mold Finding attic mold early can save Toronto homeowners from significant issues. Here are the warning signs to watch: The best time to check your attic is following heavy rain, snowmelt, or between seasons when mold loves to grow quickly. How to Inspect for Mold in the Attic Attic inspections for mold need careful attention and a step-by-step approach. You should check regularly since mold can start growing just 48 hours after moisture exposure. Visual signs to look for Start by examining your attic space carefully. Here’s what you need to watch for: These visual signs help spot potential problems, but mold often grows in hidden spots. If you smell musty odours without seeing any signs, mold might exist inside the walls or ceiling cavities. Using moisture meters and thermal imaging Professional tools can substantially boost your ability to detect mold: Moisture meters tell you how damp materials like wood and drywall are. Wood with readings above 17% shows a high risk for mold growth. These devices help you find moisture sources before mold becomes visible. Thermal imaging cameras spot temperature differences you can’t see with your eyes. These advanced tools identify cool areas that might have moisture. Expert inspectors can check your attic without going inside. They can see if temperature differences between the attic and the house matter. Thermal imaging can’t see through walls but detects surface temperature changes from moisture. This technology lets you check large areas quickly without surface damage. When to call attic mold inspection specialists DIY attic inspections mold removal help, but some situations need professional expertise: Certified inspectors use specialized equipment like industrial-grade moisture meters, thermal cameras, and hygrometers to check indoor humidity. They know how to take samples safely without spreading contamination. Certified experts can also find the mechanisms of moisture problems—crucial to stop mold from coming back after cleanup. What Happens During a Certified Attic Mold Inspection Certified attic mold inspection starts when technicians arrive at your home. Understanding this process will help you know what happens in each phase of this important assessment. Original assessment and air quality testing Toronto Qualified technicians begin with a complete visual assessment of your attic space. They look for visible signs of moisture, staining, and active mold growth. Their special equipment includes thermal imaging cameras. These cameras reveal hidden moisture. They also use thermal hygrometers to measure temperature and humidity levels. These tools help them find issues you can’t see with your eyes. The team checks ventilation and airflow. They inspect soffits, baffles, exhaust fans, and roof vents. This helps them understand why issues occur. Sampling and lab analysis After completing the visual assessment, technicians collect air samples with specialized pumps that pull air through mold spore traps. Every proper test needs at least two samples – one from your attic and another from outside as a “control” sample to match for results. An accredited third-party laboratory analyzes these samples, usually providing results within 2-4 days. This unbiased testing shows whether mold spore levels are normal, moderate, or high. Reporting and next steps The lab analyzes the data, leading to a detailed report that outlines any air quality issues found. Professional inspectors will walk you through the findings and recommend specific solutions based on the results. When they confirm mold, they create a complete remediation plan that tackles both the mold and why it happens. This systematic approach will give a lasting solution while preventing future outbreaks through targeted moisture control measures. Attic Mold Removal and Prevention Strategies Spotting mold in your attic requires quick action. A professional cleanup provides you with the safest and quickest way

Uncategorised

Winter Basement Flooding Tips

Basement flooding can devastate your home. Even minor cracks measuring just an eighth of an inch could leak up to 250 gallons of water daily. The freeze-thaw cycle creates perfect conditions for basement water problems during winter temperature fluctuations. Snow and ice melt faster, then refreeze before proper drainage occurs. Many regions have faced more intense and frequent heavy rain in the last five years. You need to know how to prevent basement flooding during these challenging winter months. People can prevent most floods with the right knowledge and proactive steps. A properly functioning sump pump serves as our first line of defence against basement flooding. However, detailed protection often requires more measures. This blog explains the most common causes of basement flooding and practical solutions to keep your basement dry. You’ll learn what to do during a basement flooding emergency and when to call certified basement flooding services. The right preparation helps you avoid unexpected expenses and protect your home throughout winter. What causes winter basement flooding? Most homeowners don’t think about their basement’s winter problems until water starts seeping in. You can take action early by learning about these seasonal threats before they escalate into flooding emergencies. Freeze-thaw cycles and foundation cracks Powerful forces expose your home’s foundation when moisture in the soil repeatedly freezes and thaws. Water that seeps into the soil around foundations expands as it freezes, putting immense pressure on foundation walls. This constant expansion and contraction create new cracks or make existing ones bigger, which lets water in when the snow melts. The ground next to your basement gives off heat to 8 inches beyond the foundation walls and melts nearby snow. This creates the perfect conditions for water to collect between the soil and foundation, which then forces its way inside. Frozen pipes and plumbing failures Pipes can freeze when temperatures fall to -6°C (21°F). This is common in unheated areas like basements, attics, and garages. Frozen water expands inside pipes and creates pressure that can make them burst, which might release hundreds of gallons of water. You can find frozen pipes by checking for frost on the pipe. Look for leaks, strange sounds, bad smells, and low or no water pressure. These problems can quickly turn into major flooding if left unchecked. Clogged gutters and downspouts Ice, leaves, and debris in your gutters block proper drainage. Water overflows and collects around your home’s foundation. This pooled water pushes against foundation walls and finds its way through cracks. Blocked gutters and downspouts are the foundations of foundation failure. Water-saturated soil expands and damages foundation walls. This movement ends up creating cracks. Sump pump malfunctions or frozen discharge lines Winter hits sump pump discharge lines hard. A frozen discharge line stops your pump from removing basement water, which disables your entire flood defence system. Your pump works harder to push water through partial blockages. This extra effort can make it overheat and fail. Watch out for signs like constant running, frequent on/off cycling, wet areas despite operation, and strange smells. The situation gets worse as melting snow adds more water for your sump pump to handle. This extra volume can overwhelm the system right when you need it most. Outdoor steps to prevent a flooded basement in winter Your first line of defence against winter basement flooding Toronto starts outside your home. These exterior measures will reduce the risk a lot. Water won’t find its way into your basement during freeze-thaw cycles. Clear snow away from the foundation Snow needs quick removal from your home’s perimeter after it falls. Areas near window wells and the foundation need special attention. This simple task stops snowmelt from seeping into your basement when temperatures rise. Melting snow against your foundation will find its way through tiny cracks. More importantly, water needs clear pathways to flow away from your house. Basement drains flooding winter, or designated drainage areas are ideal destinations. Ensure proper yard grading Proper grading is the key to basement flood prevention measures. Your home’s surrounding ground should slope away from the foundation. This directs water away instead of toward your basement. The best protection comes from a minimum slope of 6 inches over the first 10 feet from your foundation. The rest of your yard needs a gentle 2% slope (about ¼ inch per foot). This ensures proper drainage and keeps your yard usable. You can check your current grade with a simple test. Place stakes 10 feet apart with a string between them. Your grading works if the distance between the string and the ground is more than 6 inches. Clean and extend downspouts Gutters and downspouts need an exceptionally good cleaning before winter to prevent blockages from leaves and debris. Your downspouts should extend at least 5 feet from the foundation. This stops water from pooling near your home. Some experts suggest a 1.5-2 meter extension (about 6 feet). The water should flow toward permeable surfaces like grass or gardens, or toward street drainage. Install window well covers Window well covers are a vital protection during the winter months. They stop snow, ice, and debris from building up in wells. These covers keep drainage systems clear and need less maintenance. Indoor waterproofing and drainage solutions Your basement needs internal defence systems to curb winter flooding, even with exterior precautions in place. These indoor solutions work together to create a detailed protective system. Seal foundation cracks and walls Foundation cracks can leak up to 250 gallons of water daily into your basement. Common types include shrinkage cracks from concrete curing, bulging cracks from soil pressure, and settlement cracks. Surface caulking or hydraulic cement will eventually deteriorate, so avoid these temporary fixes. Professional polyurethane injection systems or Flexi Span treatments offer better solutions that seal and maintain wall integrity properly. Install or maintain a sump pump Your sump pump needs regular winter maintenance to prevent freezing and mechanical failures. The pump requires routine testing by pouring water into the pit. You should clean debris from the basin and check if the float switch moves freely. You need to check the discharge line for blockages or ice. Frozen

Uncategorised

Filing an Insurance Claim After a Flood in Toronto

Floods top the list of extreme weather events in Toronto. Homeowners need to understand their water damage insurance coverage and know how to handle claims to protect their property. This blog breaks down the essential steps to take if floods have damaged your home. You’ll learn what your policy actually covers and get clear instructions to file your claim successfully. This information will help you manage claims and insurance with confidence. Useful for current water damage or future issues. Insurance claims can be confusing and stressful, but we’ll make the process clearer. What to Do Immediately After a Flood Quick action after a flood can protect your safety and help with your water damage insurance claim. You need to act fast to safeguard your health and get the most from your insurance coverage. Here’s what you should do: Stay safe and avoid re-entering damaged areas Your safety comes first, above everything else. Wait for official confirmation before going back to your flooded home. Floodwaters make buildings dangerous, so stay away from any structure with buckled walls or floors. Dangers can hide even after water levels drop – from contaminated water to unstable structures. You should wear protective gear like rubber boots, safety glasses, and gloves when checking your property. Note that water-soaked ceilings might collapse suddenly. Turn off power only if safe to do so Water and electricity create a lethal mix. You should not enter the basement if water has risen above electrical outlets, baseboards, or your electrical panel. Call your local electric utility to cut power to your home instead. Standing water makes electrical equipment extremely dangerous. A certified electrician should check your electrical system before turning the power back on, even after floodwaters recede. This prevents fires and electrical injuries. Document damage with photos and videos Your water damage insurance claim needs proper documentation of all flood damage. Take clear, detailed photos and videos before moving anything. Make sure to capture: Upload these images to cloud storage like Dropbox or Google Drive to share with your adjuster easily. Good documentation makes your claim stronger. Avoid discarding damaged items too soon Your first impulse might be to throw away damaged items, but you should wait. Insurance adjusters need to see the actual damage to create an accurate repair estimate. Keep samples of damaged materials such as carpet, wallpaper, and flooring. You can dispose of items that pose immediate health risks, like spoiled food or soaked pillows – but take plenty of photos first. Understanding What Your Insurance Covers Filing an insurance claim after a flood can leave you confused, especially when you have to figure out what your policy covers. You need to learn about your coverage options to protect yourself against water-related disasters. Overland flood vs. sewer backup coverage These two different coverages protect you from different types of water damage. Overland water coverage helps protect your home from damage. It covers issues from freshwater sources like heavy rain, melting snow, or overflowing rivers. These can enter your home through ground-level points. Sewer backup coverage protects you when sewage or wastewater backs up into your home through drains, floor drains, or septic tanks. Your standard policy doesn’t have either of these coverages—you need extra endorsements for both. Is water damage covered by insurance? Standard home insurance covers sudden and accidental water damage from indoor sources. This means you enjoy protection against burst pipes, appliance malfunctions, watermain breaks, and water damage from firefighting efforts. Most policies don’t cover gradual leaks, seepage, or maintenance issues. On top of that, it takes specific endorsements to cover overland flooding. The Insurance Bureau of Canada reports that water damage makes up 50% of all claim payments. Vehicle damage and comprehensive auto insurance Your standard auto insurance won’t cover vehicle flood damage. Comprehensive auto coverage usually protects your car from water damage. This includes damage from flooding, rising water, and storms. You’ll likely pay all flood-related vehicle repairs yourself without this optional coverage. Hardwood floor and basement water damage Insurance typically covers water damage to hardwood floors from “sudden and accidental” events like burst pipes or appliance leaks. Basement flooding can get pricey—the Canadian government says fixing a flooded basement costs an average of CAD 55,734. You won’t have coverage for basement flooding from heavy rain or sewer backups unless you add specific endorsements. Additional living expenses and food spoilage Additional Living Expenses (ALE) coverage helps pay your costs if you can’t live in your home after an insured loss. This covers hotel stays, restaurant meals, and other extra living expenses. Most policies give you ALE coverage at 20-30% of your home’s replacement cost. Many insurers cover food that spoils in your fridge and freezer during power outages. However, there are specific coverage limits. How much water damage insurance do I need? Your coverage needs depend on where you live, how close you are to water bodies, and your local climate risks. High-risk areas need both overland flood and sewer backup coverage. Most insurers offer between CAD 13,934 and CAD 139,336 in water damage coverage. Note that cleanup costs alone can hit CAD 13,934—plus you’ll need money for demolition, storage, relocation, and reconstruction. How to File a Water Damage Insurance Claim Water damage insurance claims need careful attention to detail and proper documentation. Your safety comes first, then damage assessment before starting the claim process. Notify your insurer as soon as possible You should contact your insurance company right after you find water damage. Your policy likely requires quick notification to provide coverage. The best approach is to call your insurer’s claims hotline instead of waiting for your regular agent. You’ll need to explain what happened and describe the damage in detail. Worth mentioning is that you should write the names of everyone you talk to during this process. Prepare a water damage insurance claim list A detailed inventory of damaged items will strengthen your claim. Your list should include: This inventory becomes a vital part of your proof of loss documentation. Work with your claims adjuster A claims adjuster will contact you after your report. They will explain the situation, review your

Water Damage & Mold Removal 2
Uncategorised

Mold Removal Costs 2025 Toronto

Homeowners often worry about mold removal costs at the time they find fungal growth in their homes. Certified mold remediation typically costs between $1,200 and $3,750, with most people paying around $2,300 for standard treatments. The final price can change substantially based on the problem’s size. Small areas might set you back $500 to $1,500. Extensive whole-house remediation could reach $10,000 to $30,000. Toronto residents usually pay more for mold remediation. Higher costs stem from labor, equipment, and strict local regulations. A simple job in the city starts at a few hundred dollars. Large infestations could cost several thousand dollars. The mold problem’s severity plays a crucial role in the final price. Minor issues in small areas cost $1,500 to $2,500. Moderate problems affecting multiple rooms range from $2,500 to $7,500. Severe infestations might cost anywhere from $7,000 to $15,000 or more. This blog explores the mold removal costs in Toronto for 2025. You’ll learn about pricing factors, costs by area and mold type, and whether DIY remediation suits your needs. Understanding Mold Removal Costs in Toronto The cost of mold removal in Toronto depends on several factors. Property owners should know these before hiring professionals. A clear understanding of these costs will help you plan your budget and select the right cleanup method. What affects the cost of mold removal? The price of mold remediation depends on these significant factors: Structural damage from mold can add rebuilding costs after removal. This is a significant deal as it means that early detection helps control costs. How much does mold remediation cost in 2025? Toronto homeowners pay between CAD 4.88 to CAD 5.57 per square foot to get rid of mold professionally in 2025. Here’s the full picture: The average mold removal job costs CAD 3,483. Small surface cleanups cost CAD 696 to CAD 2,090, especially in bathrooms. Bigger projects in basements or attics cost more than CAD 6,966. Location-specific costs vary. Basement mold removal runs CAD 2,786 to CAD 13,933. Attic remediation ranges from CAD 2,090 to CAD 10,450. Black mold removal costs CAD 1,393 to CAD 6,270 because of health risks. Typical mold inspection cost in Toronto A proper inspection shows how bad the problem is. Toronto homes up to 2,000 sq ft usually pay CAD 487 to CAD 766 for standard mold inspection. This price includes visual checks, moisture testing, and two air samples. Extra air or surface samples cost CAD 111 to CAD 167 each. You’ll pay CAD 278 to CAD 557 to check if the removal worked. Professional mold testing with lab testing costs about CAD 627. A detailed inspection report costs CAD 348 and shows the problem’s scope and recommended cleanup steps. These cost factors help you prepare financially and make smart decisions about mold problems in your Toronto property. Cost Breakdown by Area and Mold Type Your mold remediation costs in Toronto will vary based on where the problem is located. A good grasp of these location-specific costs helps you budget the right amount to fix your mold problem. Attic mold removal cost Fixing mold in Toronto attics usually costs between CAD 2,090 to CAD 10,450. Simple cases run from CAD 1,393 to CAD 5,573. The price range is wide because homeowners often discover mold in attic removal cost after it has spread extensively. Small patches (under 10 sq ft) might cost CAD 697–CAD 2,090, while bigger problems can run over CAD 6,967. Basement mold removal cost Getting rid of basement mold typically costs CAD 2,787 to CAD 13,934. Basements are prime spots for moisture problems, so cleanup can get expensive. Small corner treatments start at CAD 697. However, fixing an entire basement can cost up to CAD 20,900. The price depends on the damage and how easy it is to reach. Bathroom and crawl space costs Bathroom mold cleanup stays relatively cheap at CAD 697 to CAD 2,787. Crawl space cleanup runs between CAD 697 to CAD 2,090 for simple jobs, but tough cases might hit CAD 8,360. Extra protection through crawl space encapsulation costs CAD 4,180 to CAD 11,147. Black mold removal cost Black mold (Stachybotrys chartarum) needs special treatment and costs CAD 1,393 to CAD 6,270. This toxic variety puts your health at risk and needs careful handling. Serious black mold problems can push costs up to CAD 9,754 or higher. Cost of mold remediation by square footage Toronto cleanup companies usually charge CAD 4.88 to CAD 5.57 per square foot for standard removal. Full service cleanup ranges from CAD 13.93 to CAD 41.80 per square foot depending on how complex the job is. A 50 square foot area costs CAD 697–CAD 1,742, while a 1,000 square foot project runs from CAD 13,934–CAD 34,834. DIY vs Professional Mold Removal The choice between DIY mold removal and professional help depends on several factors. Toronto homeowners can save money and avoid health risks by knowing which approach works best. When is DIY mold removal safe? You can safely remove mold yourself in areas smaller than 10 square feet (about a 3 ft. by 3 ft. patch). This works best on non-porous surfaces like glass, tiles, or metal. Simple cleaning solutions like borax mixed with hot water or vinegar can tackle small jobs. People without existing health conditions can handle minor mold issues safely. Risks of DIY mold treatment DIY mold treatment might save money, but it comes with real risks. Most homeowners don’t have the right equipment or containment methods. This can spread mold spores throughout the house. On top of that, poor handling can cause health problems like breathing issues, skin rashes, and chronic fatigue. Basic cleaning often misses hidden mold or the original moisture source, which leads to recurring problems. People without experience can damage their home’s structure during removal. Benefits of hiring a certified professional Certified mold remediation gives you a complete mold removal solution with clear advantages. Certified technicians get a full picture using specialized equipment like moisture meters and thermal imaging to find hidden mold. These experts use industry-standard containment methods including negative air pressure and HEPA filtration to stop cross-contamination. They also fix why it happens with moisture, which stops future mold growth. How much does it cost to remove mold professionally? Professional mold removal in Canada usually costs between CAD 2,786.72 and CAD 8,360.16. Small jobs might run from CAD 696.68 to CAD 2,090.04, while extensive infestations can

Scroll to Top

Water Damage, flooding, or mold issues, our expert team is available 24/7 to restore your property. Contact Us Now!

Call Now