

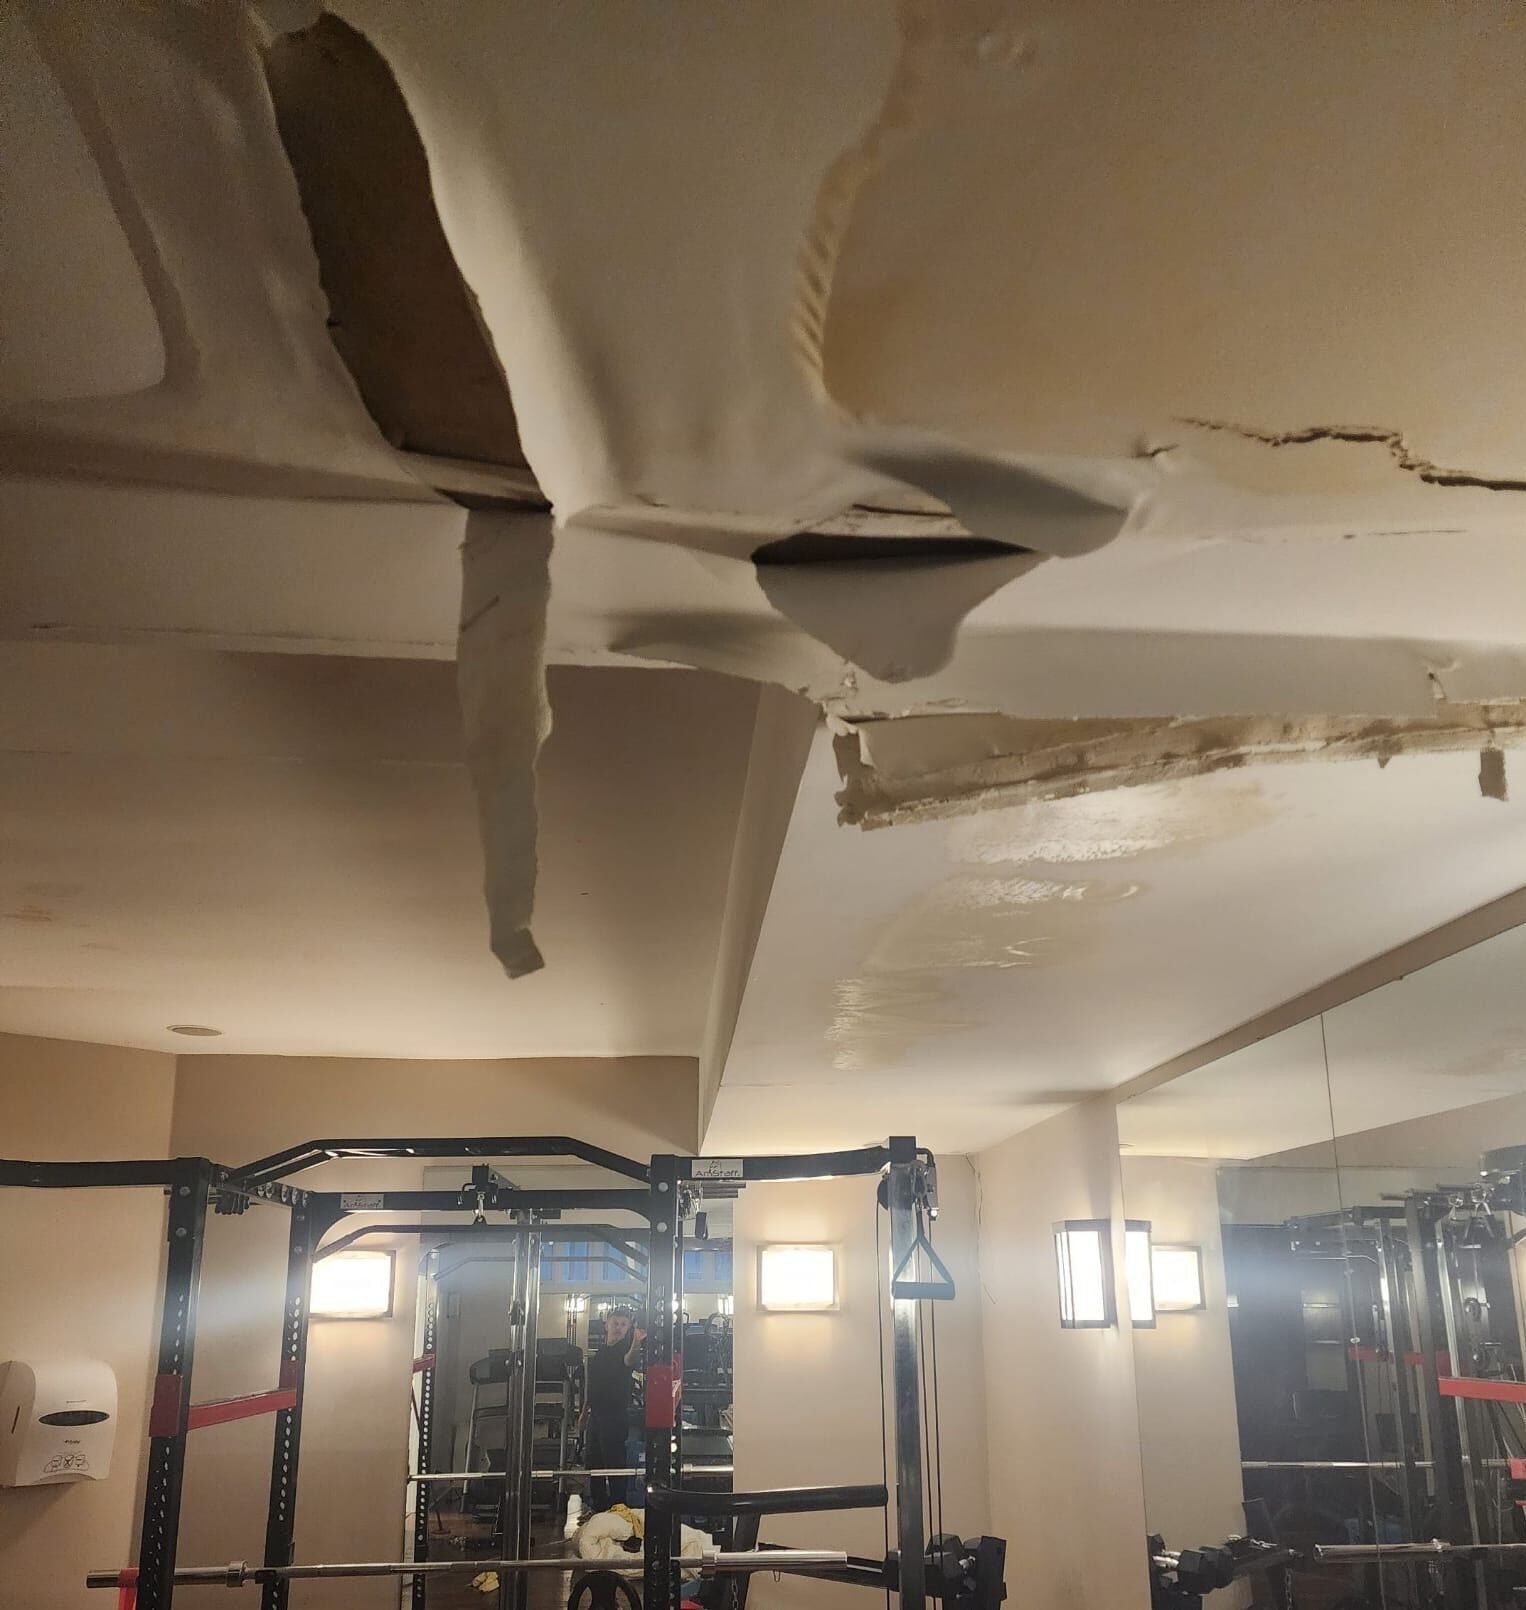
A brown ring over a bedroom, hallway, or commercial ceiling is not a paint problem first. Ceiling water stain repair begins with finding and stopping the water source. If moisture is still entering the ceiling cavity, a fresh coat of paint may hide the mark briefly while mould, damaged insulation, softened drywall, and electrical risks continue out of sight.
A stain can appear days or weeks after the original leak. That delay is why property owners should treat it as evidence of a water event, not proof that the area is dry. The right repair sequence is source control, moisture inspection, drying, removal of unsalvageable materials, and finish restoration.
When a ceiling stain needs immediate action
Move quickly if the ceiling is wet to the touch, sagging, bubbling, actively dripping, or spreading. A swollen ceiling can hold a surprising amount of water and may collapse without much warning. Keep people away from the area, protect furniture if it is safe to do so, and place a container below drips.
Turn off electricity to the affected room only if you can do so safely and the panel is accessible without entering a wet area. Do not touch light fixtures, ceiling fans, or exposed wiring near the stain. Water around electrical components requires professional assessment.
An active leak after a storm may point to roof damage, flashing failure, ice damming, or a blocked drainage path. A stain below a bathroom, kitchen, laundry room, or mechanical space often indicates a plumbing leak, drain failure, overflowing fixture, or appliance supply-line issue. In a condo, the source may be in a neighbouring unit or a common building system, so notify property management promptly and document the damage with photos.
Do not paint over a wet stain
Painting over a ceiling stain before drying the structure is one of the most common repair mistakes. Standard ceiling paint does not stop moisture, does not correct the source, and may peel or blister as the drywall continues to deteriorate. It can also delay discovery of mould growth inside the ceiling cavity.
Even if the ceiling feels dry, moisture may remain behind the visible surface. Drywall, wood framing, insulation, and textured finishes absorb water differently. A small stain can be connected to a larger wet area above it, particularly where water has travelled along framing or piping before finding a low point.
The visible mark also does not identify the category of water involved. Clean water from a recent supply-line leak is handled differently from water affected by a drain backup, sewage, or floodwater. Contaminated water can require controlled removal, cleaning, and disinfection rather than a cosmetic patch.
How professionals assess the cause and extent
A proper inspection starts above the stain and follows the most likely path of water. Restoration technicians examine plumbing connections, roof or attic conditions, HVAC equipment, bathrooms, appliances, and exterior entry points. They use moisture meters and thermal imaging to identify wet materials without opening more of the ceiling than necessary.
This assessment matters because ceiling damage is often deceptive. A leaking pipe can wet insulation and framing over a wide area while leaving only one small discoloured circle below. Conversely, an old stain may be dry and stable, but only testing can separate an old cosmetic issue from active moisture.
If the ceiling is textured, older, or visibly damaged, material testing may be appropriate before demolition. Some older building materials can contain asbestos, and scraping or cutting them without the right precautions can create a much larger problem. The repair plan should match the material, the age of the property, and the extent of contamination.
The correct ceiling water stain repair process
Once the leak is stopped, restoration work focuses on drying the affected assembly before reconstruction. The exact approach depends on the water source, how long materials were wet, and whether the drywall or insulation can be saved.
1. Stop the source and stabilize the area
A plumber may repair a failed pipe, fitting, toilet seal, or appliance line. A roofer may address damaged shingles, flashing, vents, or an ice-dam condition. In a condo or commercial building, management and the relevant unit owners may need to coordinate access before the source can be corrected.
If water is trapped above the ceiling, controlled drainage may be necessary to reduce the risk of collapse. This should be done carefully, especially near electrical fixtures or when the ceiling is heavily sagging. Avoid cutting into a ceiling yourself if you do not know what is above it.
2. Dry the structure, not just the surface
Professional drying equipment moves air, controls humidity, and removes moisture from building materials. Depending on the situation, technicians may use air movers, dehumidifiers, and carefully placed access openings to dry the cavity. Moisture readings should guide the process, not guesswork or the appearance of the ceiling.
Drying can take several days. Faster is not always better if the process causes cracking, warping, or incomplete drying in concealed areas. The goal is to return materials to an acceptable moisture level before closing the ceiling and applying finishes.
3. Remove materials that cannot be restored
Drywall that has sagged, crumbled, delaminated, or remained wet for too long usually needs replacement. Wet cellulose insulation is often removed because it loses its insulating value and can hold moisture against framing. If mould is present, affected materials may require containment and specialized remediation rather than routine demolition.
This is where early intervention pays off. A small, clean-water leak discovered and dried quickly may require limited repair. A neglected leak can turn a paint touch-up into drywall replacement, insulation removal, mould remediation, and reconstruction.
4. Rebuild the ceiling properly
After drying and any required remediation, the damaged section can be rebuilt with new drywall, joint compound, sanding, priming, and painting. Matching a repaired patch to the surrounding ceiling can be difficult, especially with stipple, popcorn, or other textured finishes. In many cases, painting the full ceiling gives a more consistent result than blending paint into one small area.
Before the final coat, use a quality stain-blocking primer designed for water stains. This prevents tannins and mineral discolouration from bleeding through the new paint. Primer belongs at the end of the moisture-control process, not at the beginning.
When DIY repair may be reasonable
A homeowner may be able to handle a small, fully dry stain when the water source is confirmed and repaired, moisture checks show the area is dry, there is no sagging or mould, and the drywall remains sound. In that narrow situation, stain-blocking primer and ceiling paint may be enough.
It is time to call for professional help when the stain is active, expanding, soft, or accompanied by a musty smell. The same applies if the water source is unknown, the damage involves sewage or floodwater, the ceiling contains texture that may need testing, or a tenant, condo board, insurer, or commercial operator needs documented restoration work.
For Toronto and GTA properties, rapid response is especially valuable after frozen-pipe events, wind-driven rain, roof leaks, and upper-unit overflows. CPR24 Restoration can assess the damage, locate hidden moisture, dry affected materials, address mould concerns, and complete the repair work without leaving the property owner to coordinate multiple stages of recovery.
Protecting insurance and preventing a repeat
Take clear photos before cleanup, including the ceiling, the suspected source, damaged contents, and any visible dripping. Keep invoices for emergency plumbing, roof repair, mitigation, and reconstruction. Your insurer may require timely notice, and thorough documentation helps establish what happened and when.
Prevention depends on the source. Inspect plumbing supply lines and appliance hoses, maintain roof coverings and flashings, clear eavestroughs where safe, address attic ventilation and insulation issues, and respond quickly to slow drips below bathrooms or mechanical rooms. Property managers should also make leak reporting simple for tenants, since a small report can prevent a major claim.
A ceiling stain is your property giving you an early warning. Treat it as a reason to investigate now, while the repair can still be controlled, rather than waiting for the ceiling to soften, mould to develop, or the next rainfall to expose a larger failure.